|
|
|
|
|
Headlight & Bumper
Splash Shield Repair
I was missing the
head light bulb stay for my right light causing it to flop around so I
decided I would get a new stay for it. Well
I did not have enough money in the bank to pay for the entire light
fixture for a lousy little piece of wire that holds the bulb in place.
I was checking around for a salvaged unit but with no luck.
I contacted Brutal on Jaguarforums.com who was able to hook me
up. At the same time I had
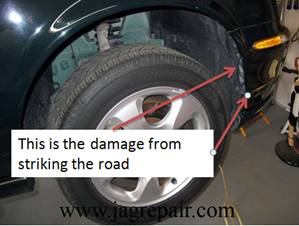
struck the road surface with the right side of my bumper splash shield.
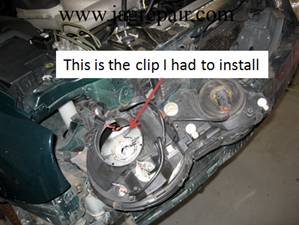
I bring this up now because the only way to install that clip on
the light is to remove it and to do that you must remove the bumper
shield and I thought I would do it all at the same time.
It was not possible
to install that clip without the removal of the light fixture.
The damage was minor but was a good time to fix it.
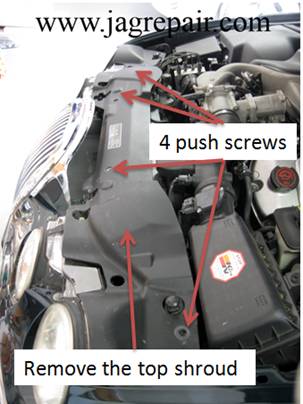
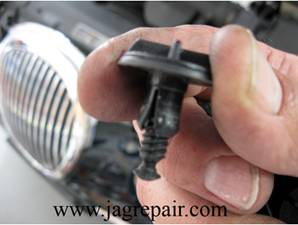
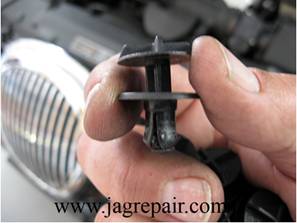
Remove the top shroud
cover by removing the 4 push screws that hold it in place.
This is what the push
screws look like.
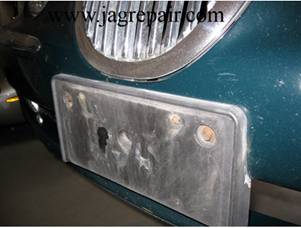
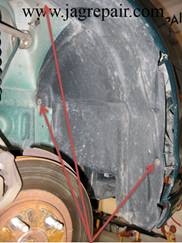
I did not get a photo
of the splash pan as I was removing it but this will do.
You need to remove the bolts securing it and the two bolts for
the front license plate.
To remove the wheel
well shroud remove a few screws and plastic nuts.
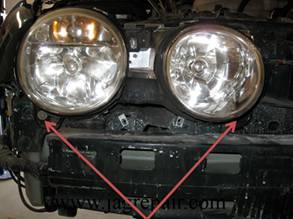
Inside you will see a bolt securing the front bumper shroud to
the fender on both sides.
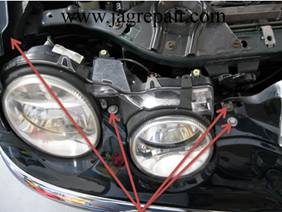
On the left you will need to unplug the lights and the wire stay.
Remove the 4 bolts on
each side and remove the shroud.
It will take a little wiggling to get it out.
It is not heavy just needs a
little movement.
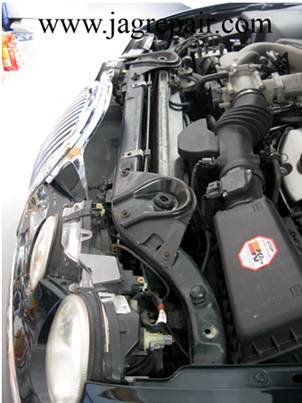
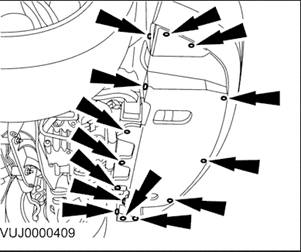
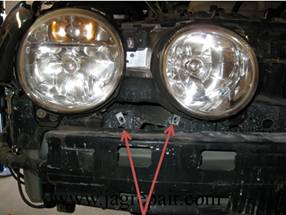
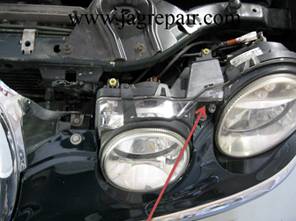
Between the lights
you have a brace that needs to be removed.
The photo to the right shows the
location of the bolts holding it.
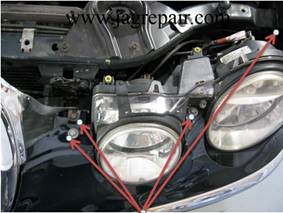
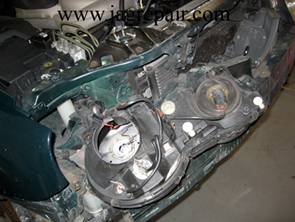
Remove the two bolts
holding the headlight assembly and lay it down for access to the back of
the light.
Now I could install
the bulb retaining clip.
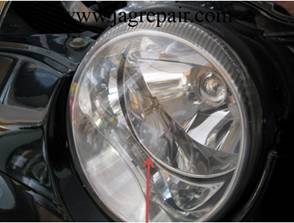
Now that I had access
to the lights (both of them) I checked to see if my adjusters were
broken and this light assembly (right side) was OK.
However when I checked the one on the left I was not so lucky.
As Brutal suggested I
reached behind the light assembly and was able to move the internal
light freely.
A permanent repair
requires you to remove the light assembly, remove the lens cover and
replace the plastic adjuster that is broken and reassemble.
I elected not to do that.
The going cost on the net for the adjuster is about $40.00.
That was a little hard to swallow along with the possibility of
me breaking the lens at a cost of $600.00. I elected to go with Brutal’s
repair to install a screw to sandwich the assembly between the broken
adjuster and the screw. I
need to caution you that when you have the lights adjusted
professionally you need to tell them that this repair was done.
Additional damage could result to the light having pressure
applied to one side and the other not moving because of this repair.
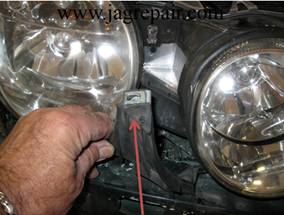
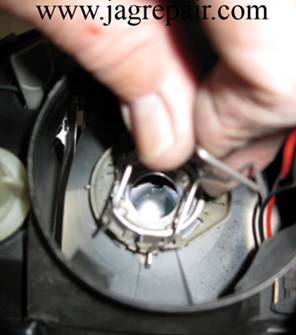
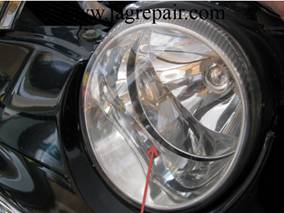
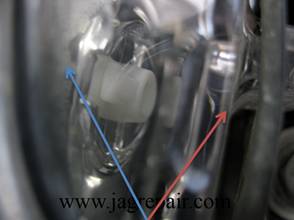
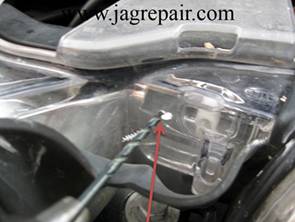
The location of this
repair is between the headlight beams.
The photo to the right is looking down from the top of the lens.
The red arrow is the front lens and the blue arrow is the
internal assembly that is loose.
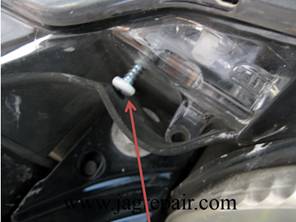
I elected to drill to
the right of what appears to be a part of the broken adjuster.
The size of the hole is dependent on the size of the screw. I
used a screw I had in my shop that I thought was long enough.
I installed the screw until the assembly inside was not moving. I
then removed the screw and cut it to size keeping in mind that
adjustments will take place and the screw could end up being short.
Thank you Brutal this was a good fix.
|
|
|