|
|
|
|
|
2010 Jaguar XF 5.0 Belt Tensioner
I had noticed a little whining noise from the front of the engine so I
began to investigate to find the problem.
I thought it was coming from the power steering pump or the A/C
compressor but I was wrong.
After using my engine ear and stethoscope I found the noise coming from
the belt tensioner. I
ordered the replacement tensioner but failed to get a new belt.
Next on my list of things to do.
Yes, I know better!
I should note that the workshop manual recommends that you disconnect
the battery before work begins.
I did not, but that is up to you..
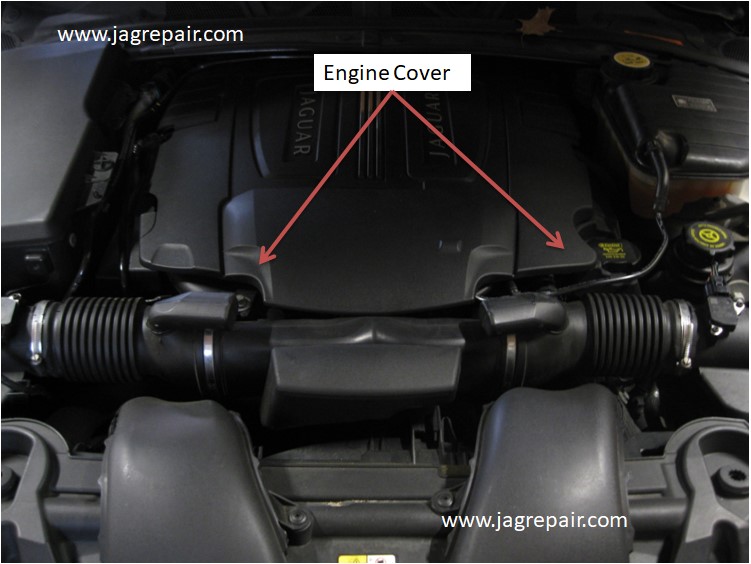
The engine cover will need to be removed.
To do so just lift both sides of the cover and when released pull
the cover towards you and it will come out.
Remember how it came out because it will be a little tricky to
put back on.
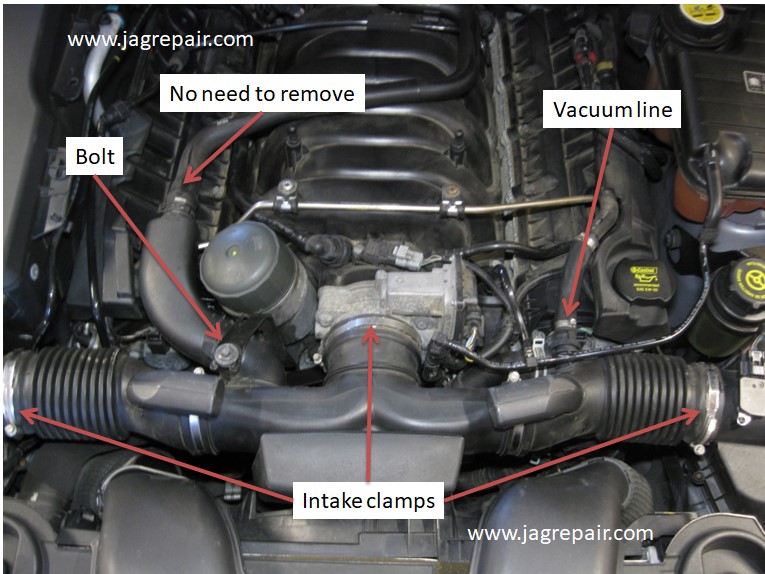
You will need to remove the intake chamber to have access to the
tensioner. I loosened the 3
intake clamps, removed the one bolt on the left and the vacuum line to
the right of the engine.
The one vacuum line above the bolt to the left is not necessary to
remove. Removing the intake
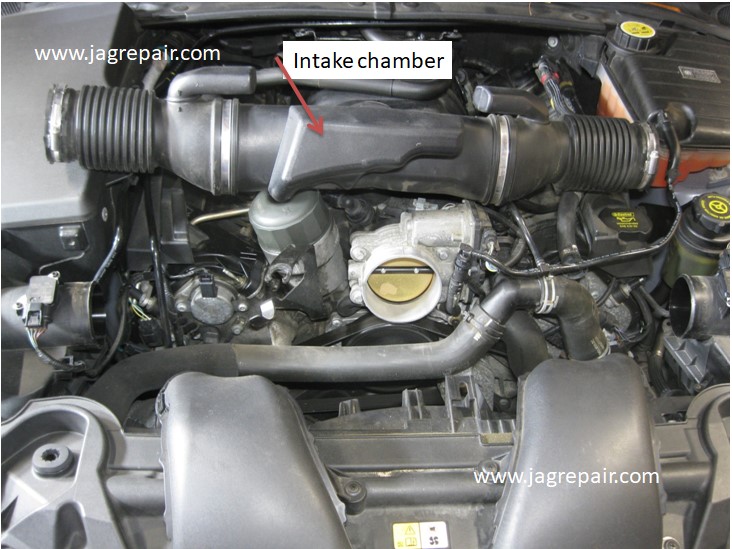
is a little tricky. You will need a little force and patients.
What I did was push evenly to retract the intake chamber from the
MAFS’s, then I pulled the intake
chamber away from the throttle body.
When doing this the bracket for the bolt you removed gets in the
way. It is a little
flexible but be sure not to apply excessive pressure to get it out of
the way.
Once removed, I placed it on top of the throttle body/engine in a
position not to bend the vacuum line that you did not remove.
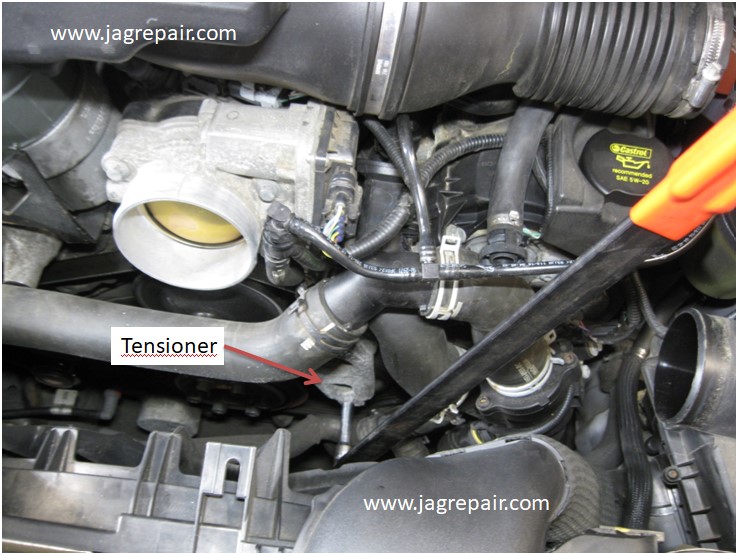
Taking the tension off the belt was a little bit of a challenge.
I had to use a short 3/8” drive extension with the tensioner tool
to get around all the hoses that were in the way.
When I got the tension off the
belt, I found I could not push the belt back away from the tensioner so
I had to remove the belt from the idler pulley.
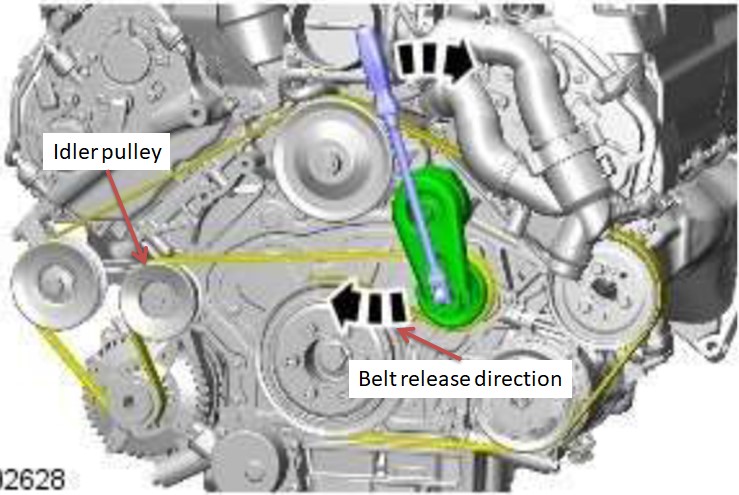
The one thing you should do is make sure you know the
configuration of your belt.
The next photo should help.
Now this is for a 2010 5.0 XF
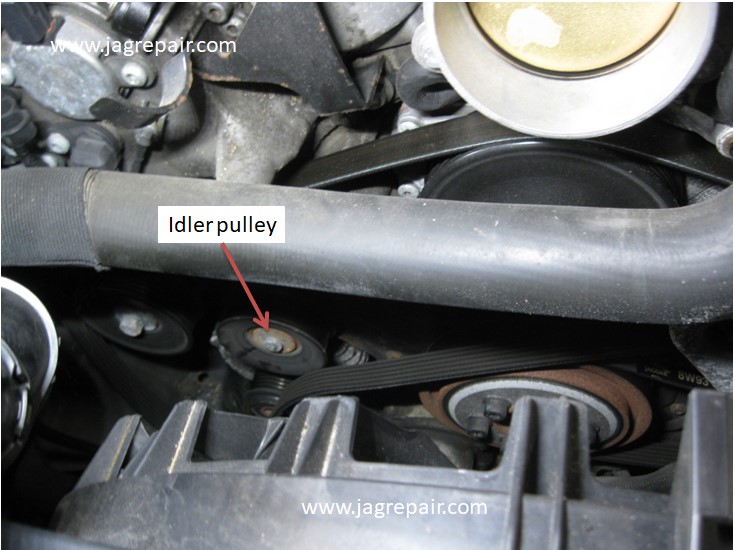
This is the location of the idler pulley.
The bolt used to hold this tensioner was a 15mm.
I used my torque wrench to give me the space I needed to get the
bolt out. You have limited
space to operate a small wrench or ratchet.
Once it was removed I noticed it did not have Jaguar markings on
it so I must assume it had been previously replaced.
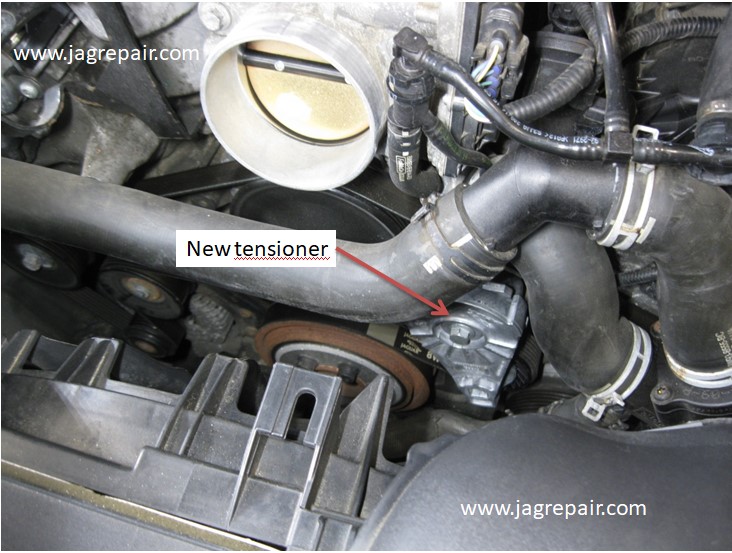
I installed the tensioner with a new bolt.
Now that bolt was a 14mm and the recommended torque for it was 40
nm. I also found that the
Jaguar tensioner uses a 1/2” drive with the tensioner tool.
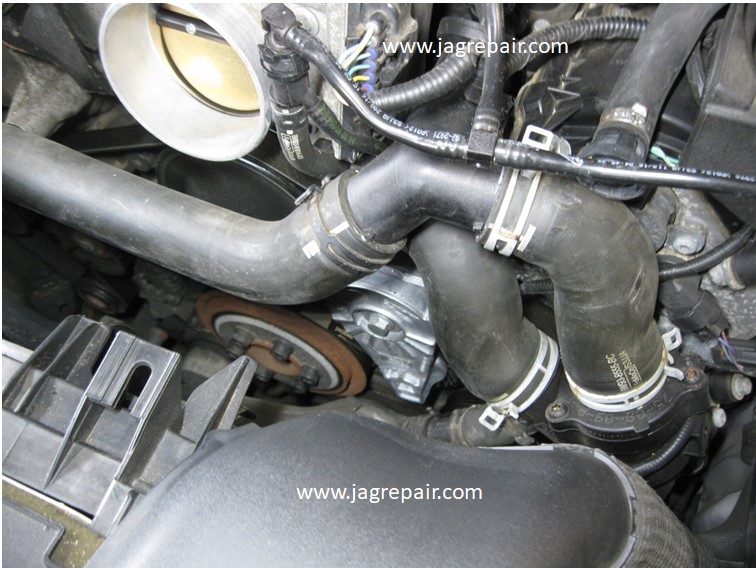
I should also mention that you may find a hose beneath the
tensioner that could interfere a little with the removal and install.
Now keep in mind aligning the new tensioner is a little tricky so
it would be best that you focus on the angle and position of the one you
removed.
I did not take a photo of putting the belt back on because I was focused
on the belt being lined up with the rest of the other pulleys.
Just be sure that the belt is seated properly on all the pulleys
before you start the car.
Also take it from one who knows, replace the belt.
Put the intake back on and try not to apply excessive force installing
the intake chamber or bellows.
|
|
|