|
|
|
|
|
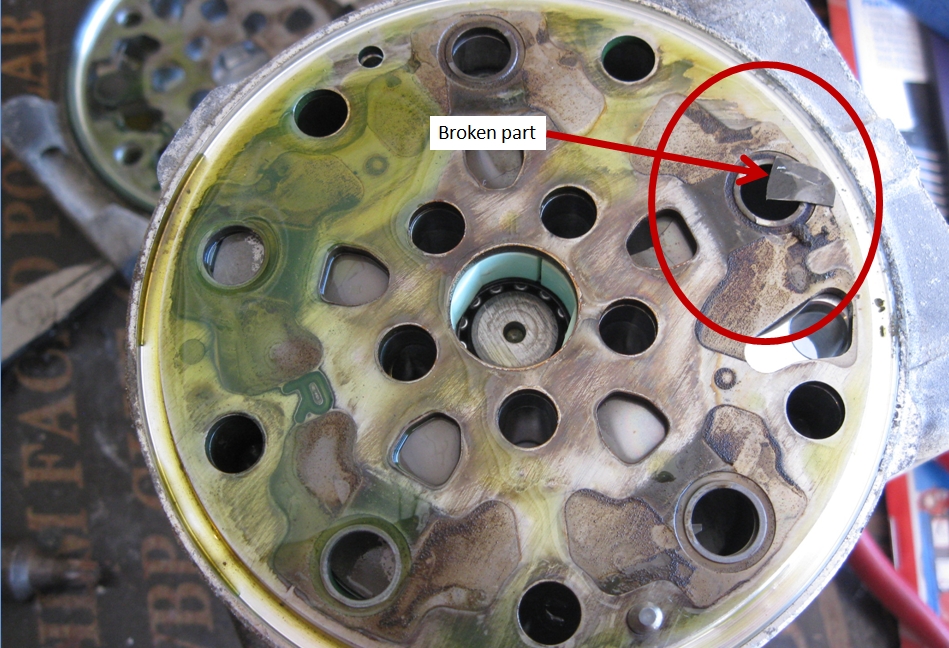
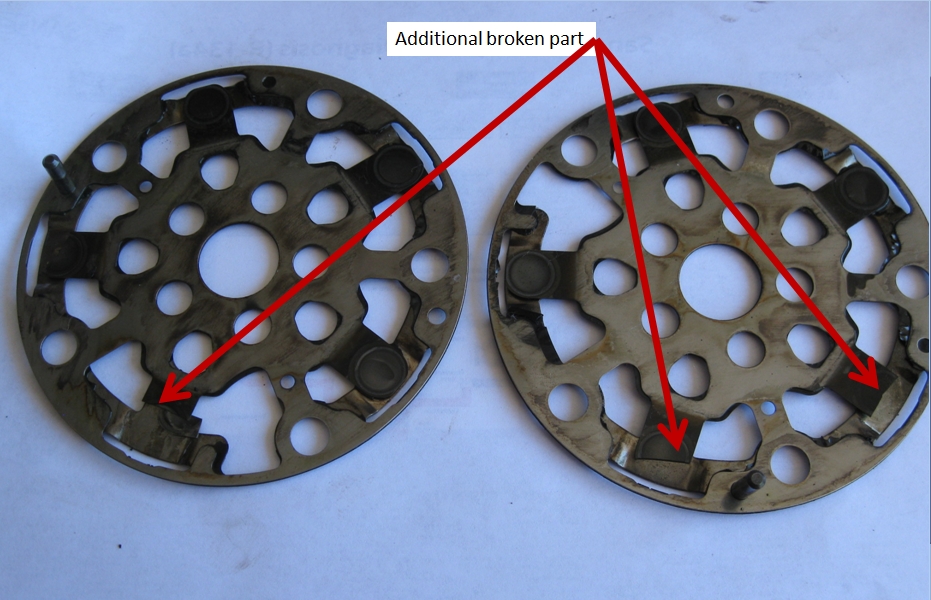
A/C Compressor Replacement and FlushI have been having a problem with a poor idle on my 99 XK8 and it got worse when the A/C was turned on. I worked on the engine idle issue and got it resolved then started on the A/C issue. With the A/C on, the idle was poor and was not cooling like it did. After many checks, I found the coolant pressure bouncing on the high side so I elected to replace the compressor. I purchased a new compressor and dryer/filter and began taking them both out. I first removed the compressor and took it apart to see what was going on. I found several of the reeds were broken and significant damage internal to the compressor. Because pieces were broken and missing, I elected to do a flush of my A/C system. Now I need to tell you that the A/C system was not a system I was familiar with so I asked a lot of questions and did a lot of reading. I should note that you should not remove the port caps on the new dryer until you are ready to install the lines. Well this is how I made my repair. Prior to
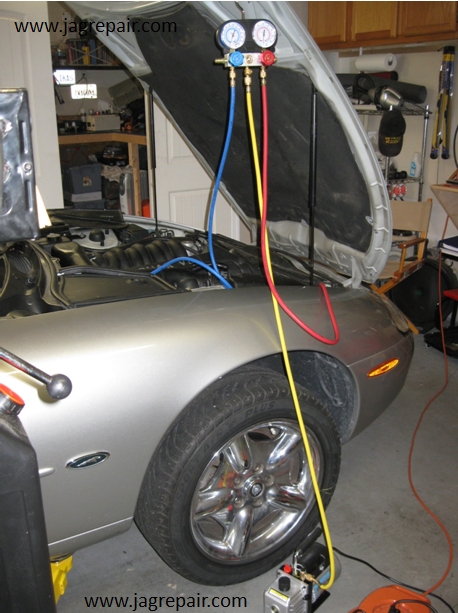
doing any work on the A/C system be sure that you evacuate the system
properly and completely into a recovery system.
If you are unable to do that take it to someone who can.
DO NOT OPEN ANY LINES OR FITTINGS WITH THE SYSTEM UNDER PRESSURE.
All safety precautions and local
regulations should be complied with when evacuating Freon from your
system.
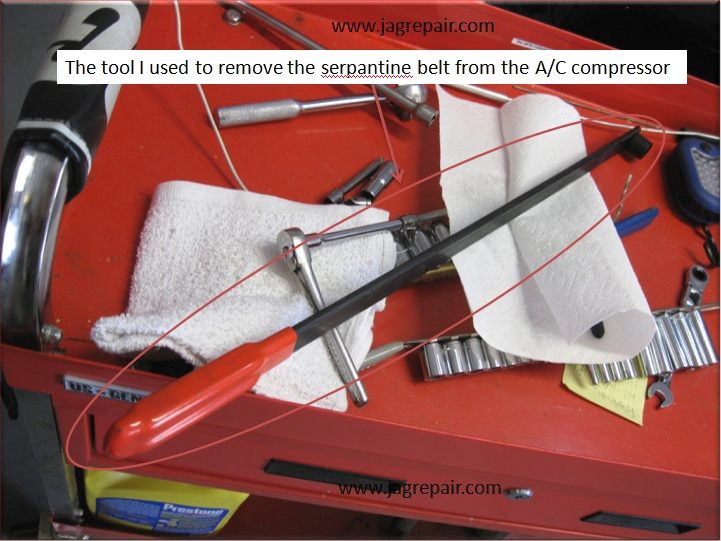
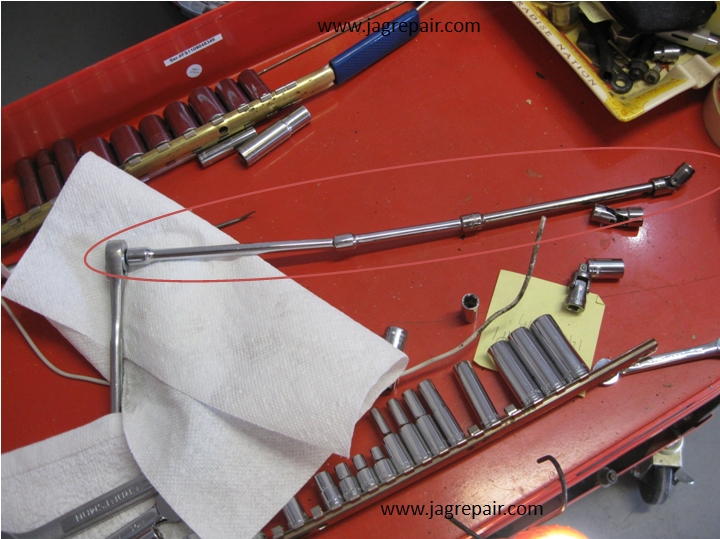
I have used a socket and breaker bar but found this to fit in that little area better and did not need to remove or relocate stuff to get the belt off.
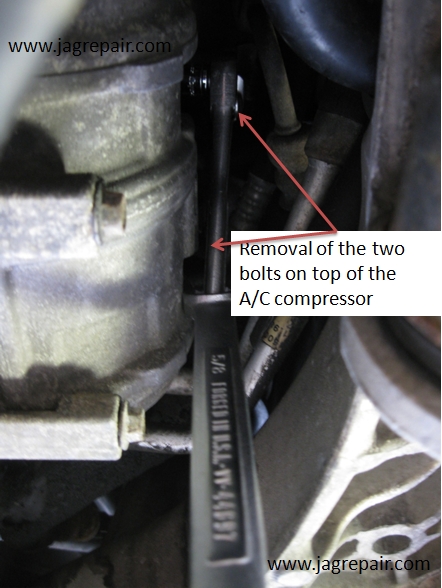
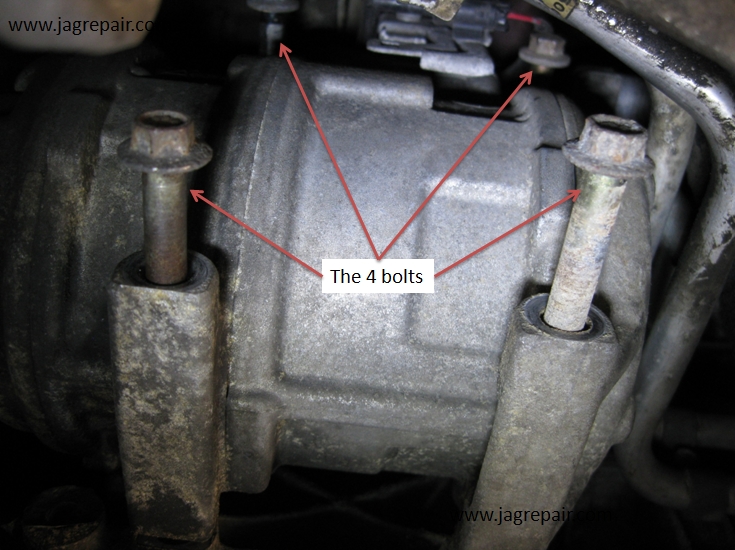
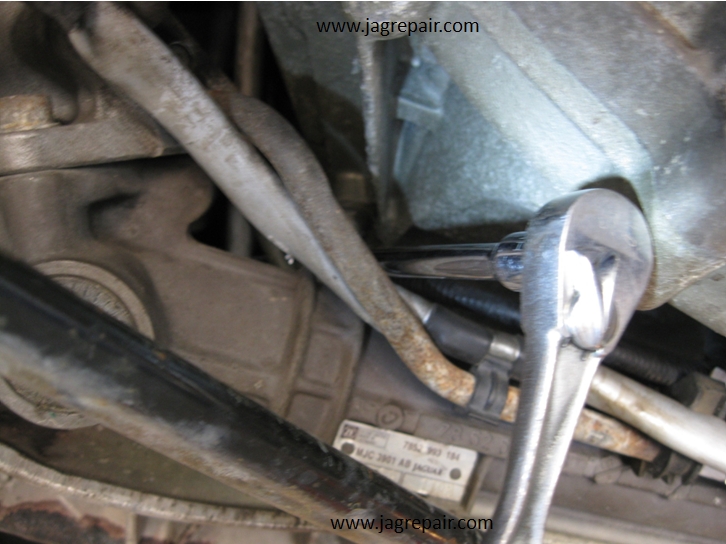
As you can see the work area is a little tight. Getting a good grip on the ratchet was limited so I put a box end wrench on the ratchet to get the 2 top bolts loose.
The 2 lower bolts were easy access. I turned all the bolts out but found that I did not have the space to remove them so in they stayed until I could position the compressor to get them out.
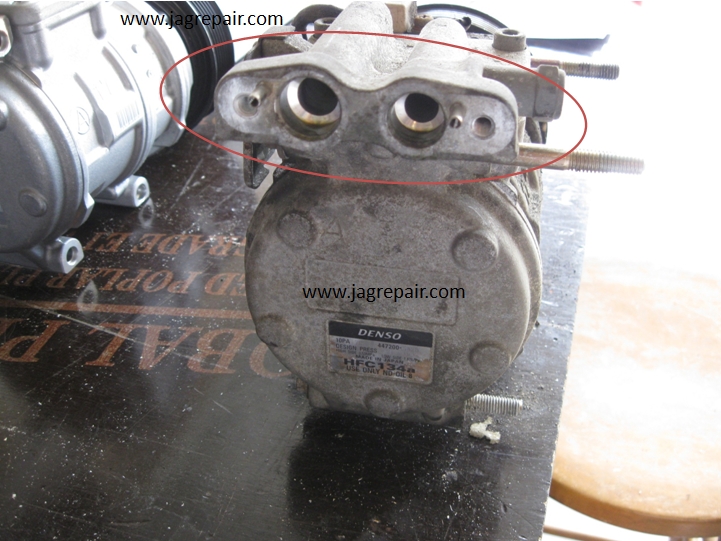
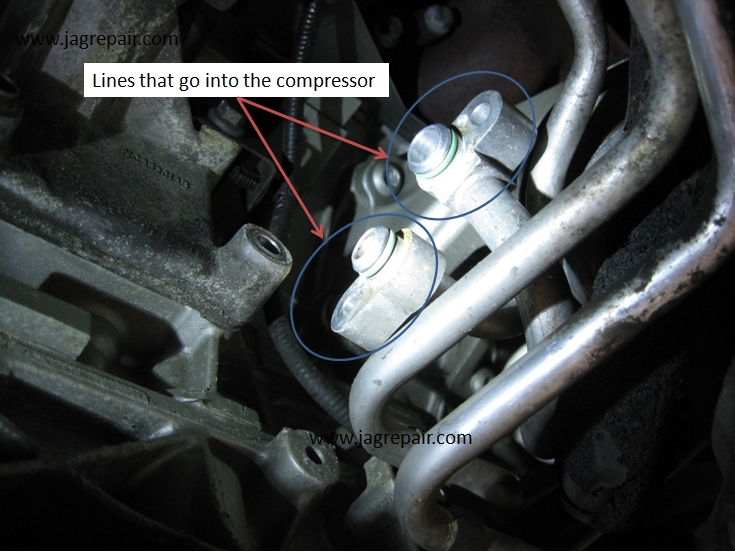
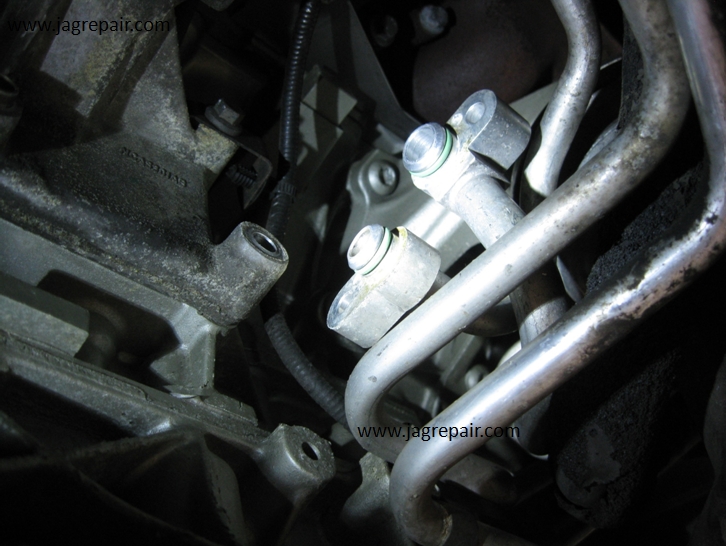
This is the back of the compressor that houses the high and low pressure fittings/lines. Both lines are held in place by one bolt and they need to be removed before the compressor can be removed from its position.
For the bolt on the inside location you will need a long extension with a swivel and a 10mm socket to reach it.
I went in above the steering rack to get to the bolt. You can see it from below but getting a tool on it is a problem.
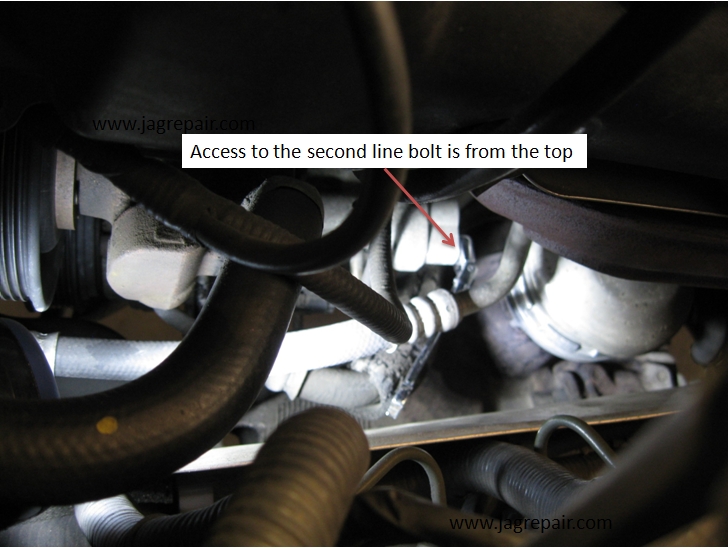
The access to the second bolt was not so bad just a little tight. At this point you need to remove the control plug and work the compressor out. Yes it is a little tricky! However, you need to pay attention to how it came out so you can get the new one in. When I did it I brought the front out first.
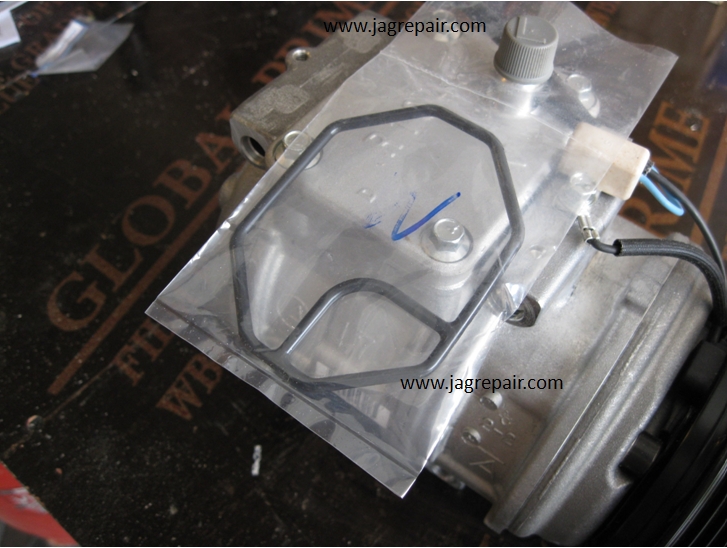
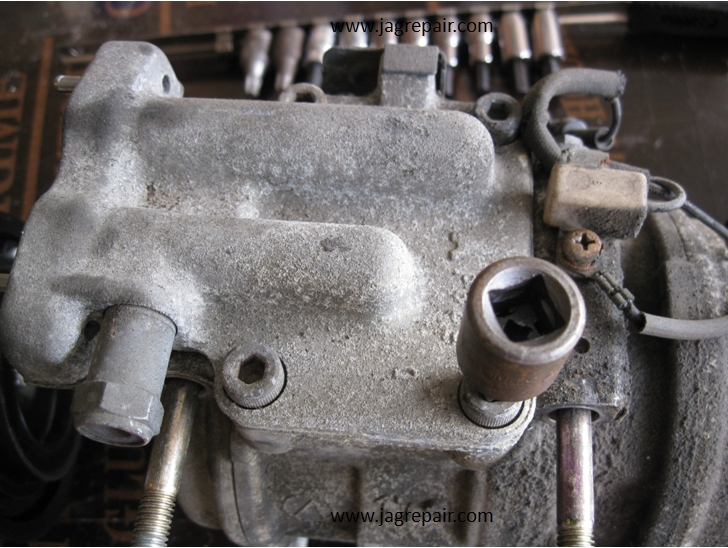
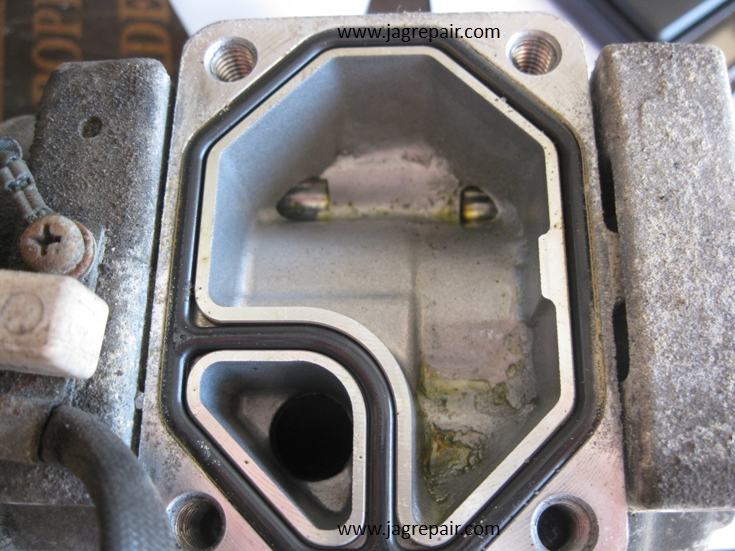
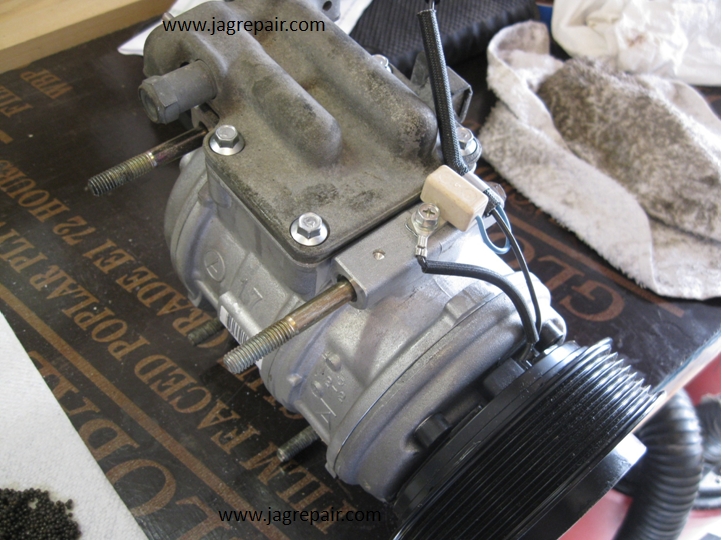
Now you need to remove the top of the compressors and move the one from the old unit to the new unit so you have a connection for the hoses. It is important that when you open the new unit that you do not get dirt into the compressor.
The new unit with gasket.
Top of the old unit that needs to be put on the new.
This is the new unit. Before you put the cover on you need to be sure you have the proper amount of compressor oil in this compressor. The proper amount is in the instructions that came with the compressor. Once you have the oil added put the cover on, rotate the pump drive (see you directions for compressor) and CAP both openings. Capping the openings prevents contamination and also prevents the loss of oil as you are installing the compressor. I can tell you first hand that it will happen. Do not install the compressor yet if you are going to flush the system. If you are not going to flush the system then reinstall the compressor. Note: Be sure to read the instructions that came with your compressor and add the proper amount of oil and the type it calls for. I used Pag 46.
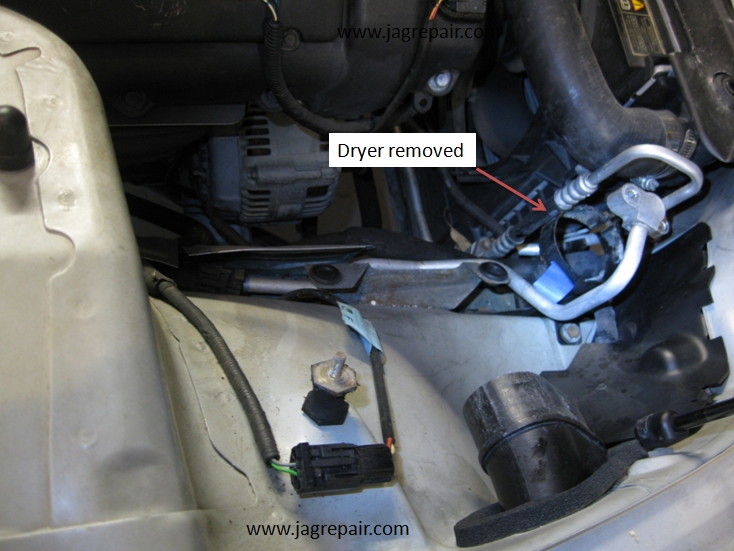
If you are going to flush the system you need to leave the compressor out.
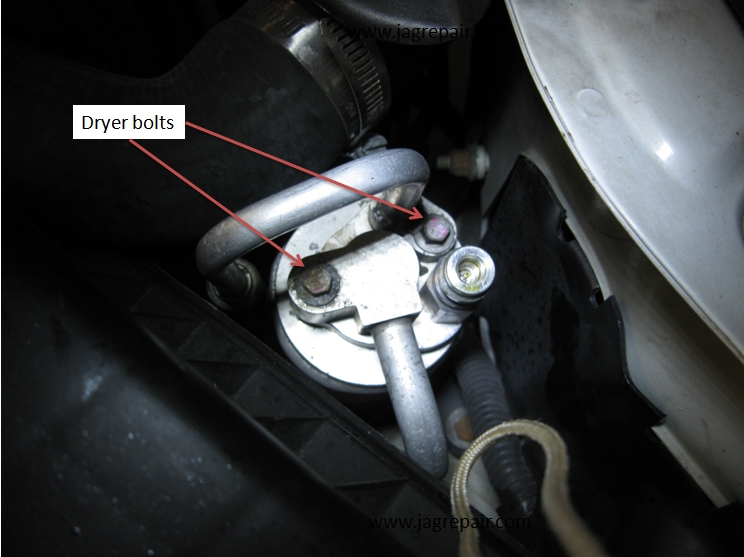
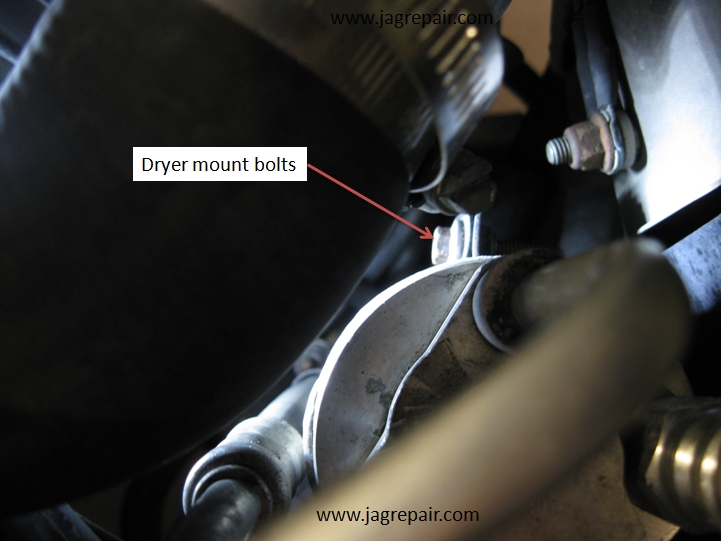
To remove the dryer, remove the 2 bolts securing the 2 lines.
Then loosen the bolt on the strap holding the dryer in place.
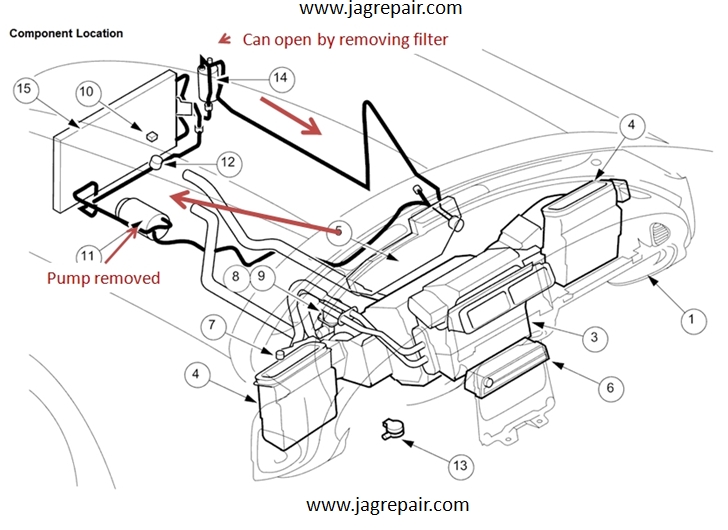
To flush the system you need to know the direction of flow. You do not want to flush the system in the wrong direction.
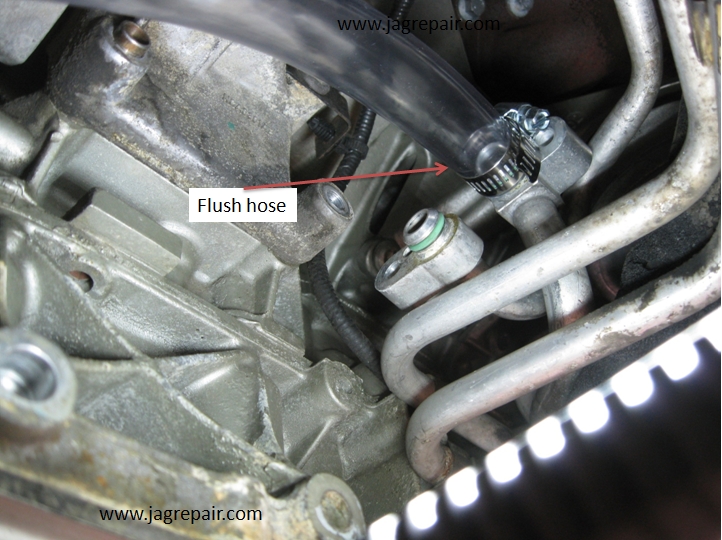
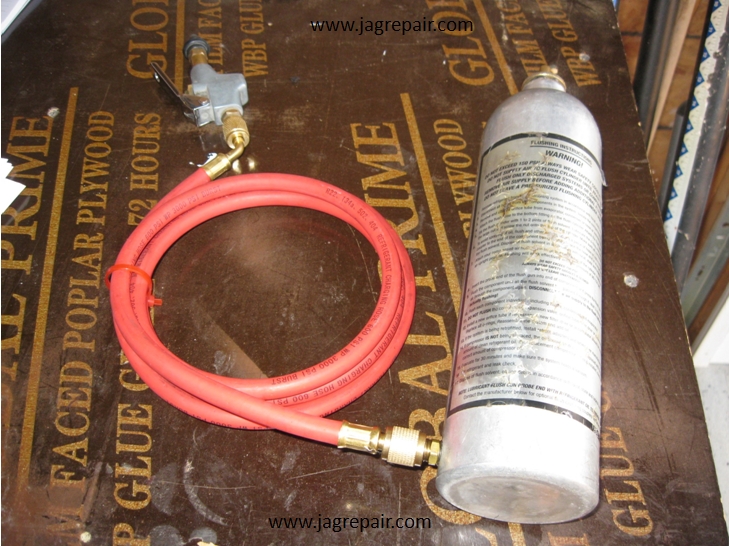
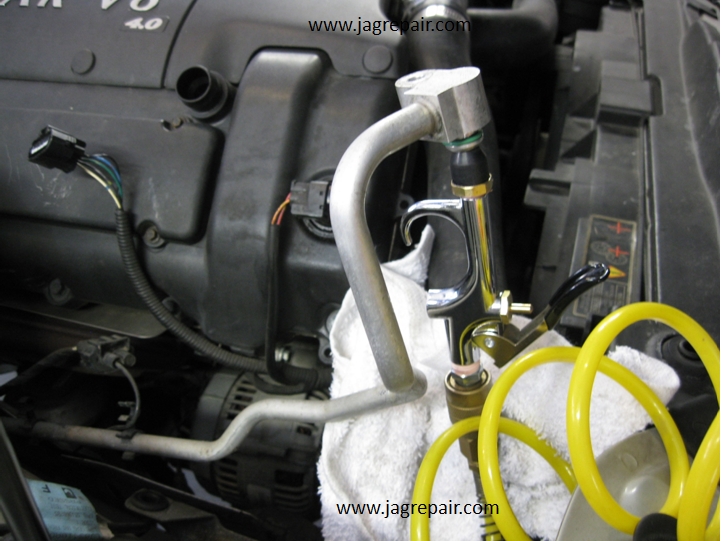
A hose was attached to the line on the outside line so the fluid could be directed into a container and not spraying everywhere. I got the hose from the local hardware store.
I filled this container (A/C Flush Kit) with A/C Flush that I got from the NAPA store. You fill the bottle with the flush and then pressurize it. You take the nozzle and attach it to the line to be flushed and start flushing. The pressure in the bottle will force the flush into the system and out the drain hose. Remember to flush in the direction of the designed flow. See photo below.
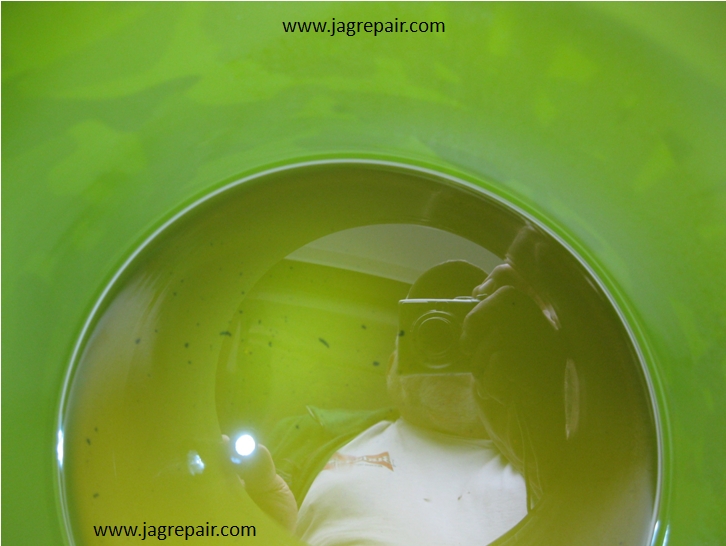
This is the flush that I captured in the bucket.
After I flushed that line I applied air to the line to remove all the flush from the system.
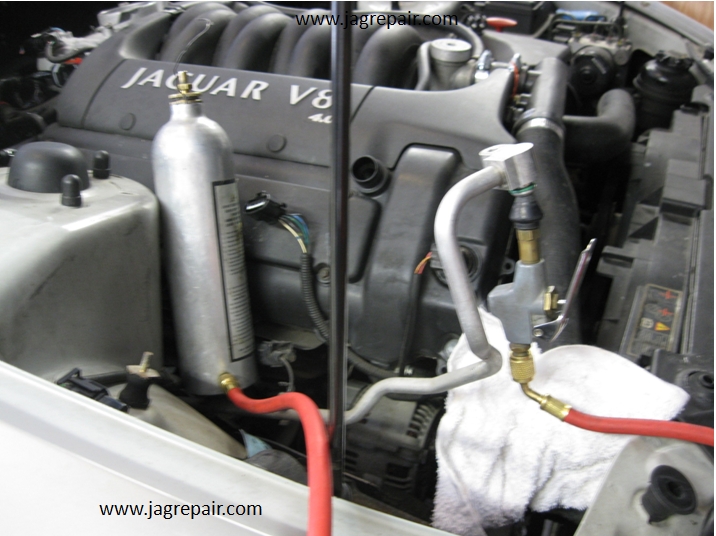
Sorry I did not get a photo of me flushing the other line but this is how I did it. In this photo, I removed the hose from the right line and in the left line I will be applying the flush.
Again no photo. At the dryer location you will attach a drain hose to the line that has the black flexible line in the picture so it can drain into a container. Do the same flush as the other line and blow it out with air.
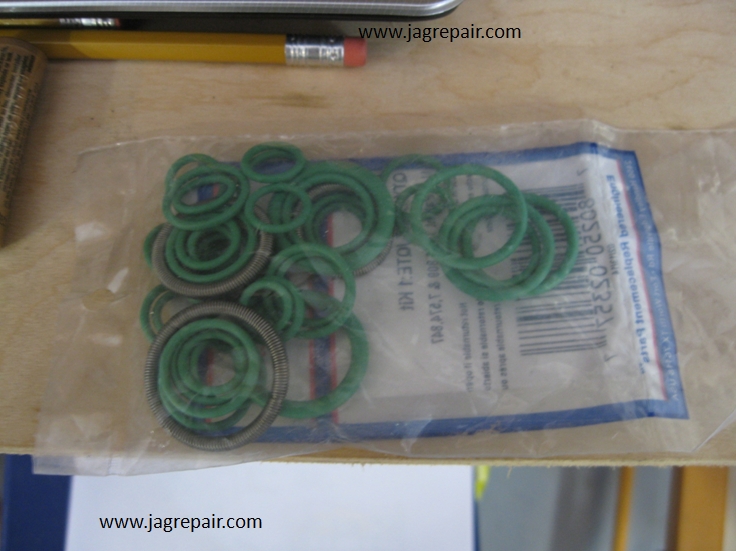
Once you have both sections flushed, install your new “O” rings on all the lines you disconnected. When doing so apply a little A/C oil on the “O” rings and ports they go into and be sure they are clean. Now you can install the compressor. Remember it is not going to be easy and be sure your bolts are in the compressor correctly. Short bolts on the bottom and long on the top. I also want to remind you to be sure the compressor ports are plugged to prevent the oil from spilling out. You will fight to get it back in. When installing the hoses be sure not to dislodge the “O” rings. You do not want to go back in for a leak. Then install your lines to both the compressor and the new dryer.
When installing your “O” rings, be sure you match them up correctly. The wrong size will cause leaks.
Now that you have it all together you will need to draw a vacuum on the system to remove all the moisture. I drew a vacuum for about 30 minutes. Then I closed both valves on my valve head and logged the readings on the valves. I then let it sit for one hour. If no loss of vacuum, proceed to fill the system.
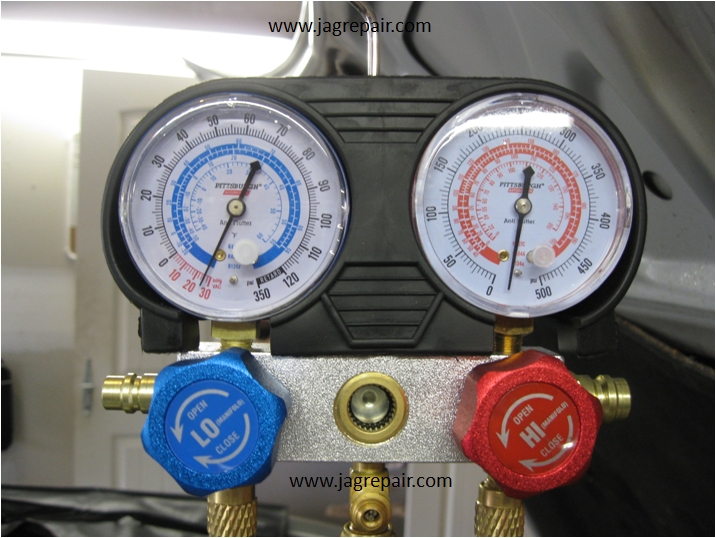
Vacuum readings.
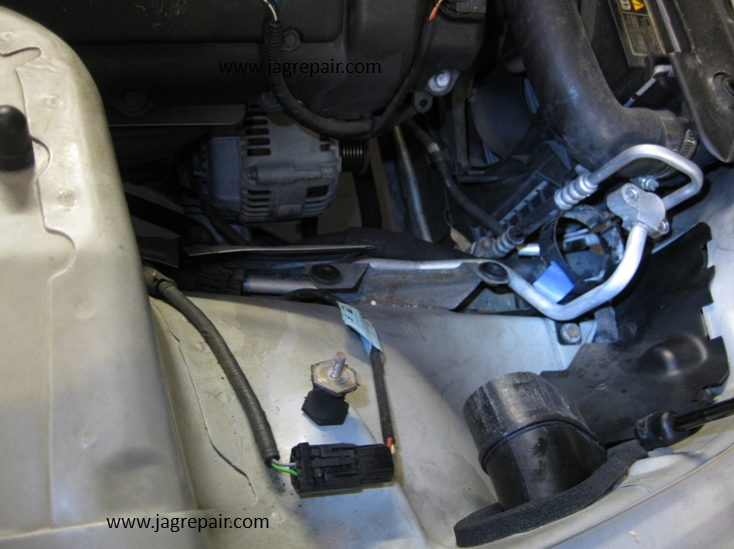
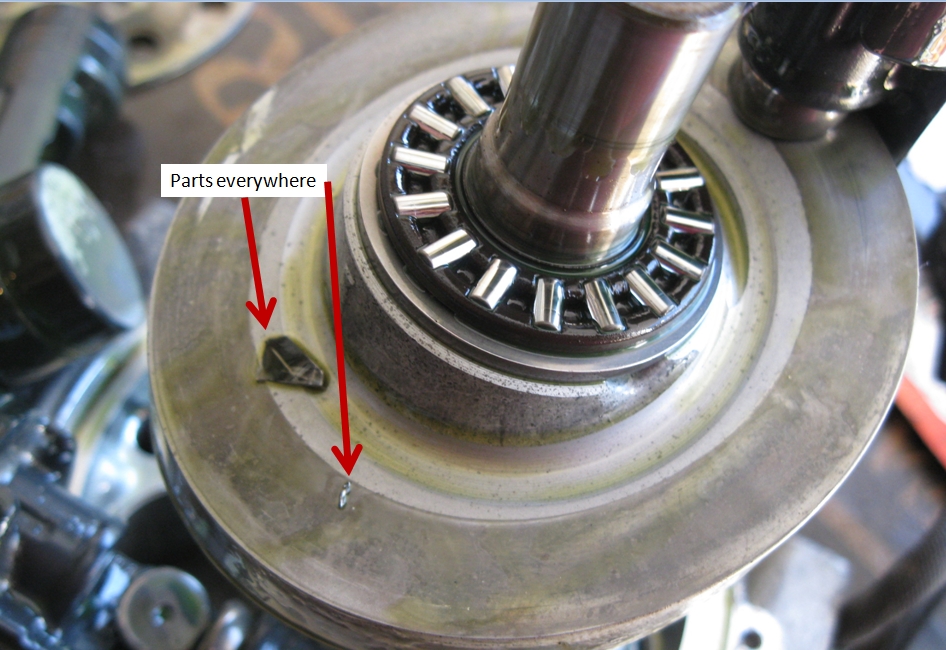
I had two choices in refilling my system. One was to use the charts and go by the pressure readings on the high and low gauges and temperature or go by the weight suggested for this system. I went by the weight and I found it on the top of the right fender. It called for 1 lb 7 oz +/- 1 oz = 24 oz. The cans I got were 12 oz X 2 oz = 24 oz so I just added 2 cans and the temperature inside went to 40 f. That worked for me!! I have a few photos of the damage to the compressor that I will post here. Also at the end I will provide a link to a “how to” on A/C systems that might help.
I hope all of this helps.
|
|
|