|
Engine Grounding Checks
My first problem was a poor idle and the second
among many was a transmission shifting issue. So I elected to check the
engine and component grounds to see if they were part of my problem and
they were not but I did improve the grounding readings.
This is how I did it.
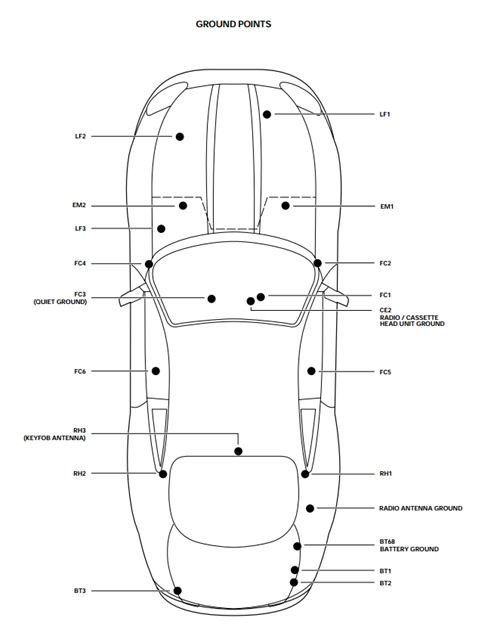
This is a layout of the grounding points on my XK8
and you can get this same layout for your Jaguar if you look at the Main
Power Distribution for your model year car.
After getting this I identified each location in my
car for access. Now I only
wanted to check the engine components but the procedure will be the same
for all of them with the exception of the grounding points for
components that need to be turned on to check for a good ground.
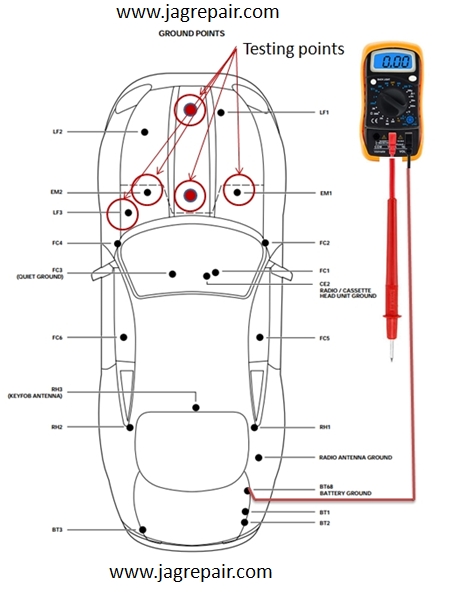
What you will need is a multi-meter and a wire with
2 clips that can reach from the Negative ground (-) battery terminal to
the front of the car. Set
your meter on DC volts and connect one lead of your meter to it. Then
connect the other end to the Negative ground (-) on the battery.
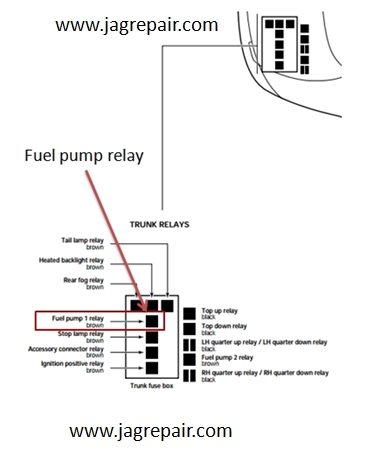
You are almost ready but you must remove the fuel
pump relay/s or fuse/s and the reason you are doing this is to prevent
the car from starting when you perform your test.
Now that the fuel pump is out of the picture you
can begin your test. The
best way to do this is for someone to be in the car to attempt to start
it As they are doing this on your command you take your other lead from
the volt meter that is set on DC voltage and touch one of your grounding
points and document your
reading. Now remember that
the car will not start but you want to crank the engine until you get
your reading. Then stop and go to the next grounding point and test it
and document your readings.
The readings should be well under .5V or 500MV.
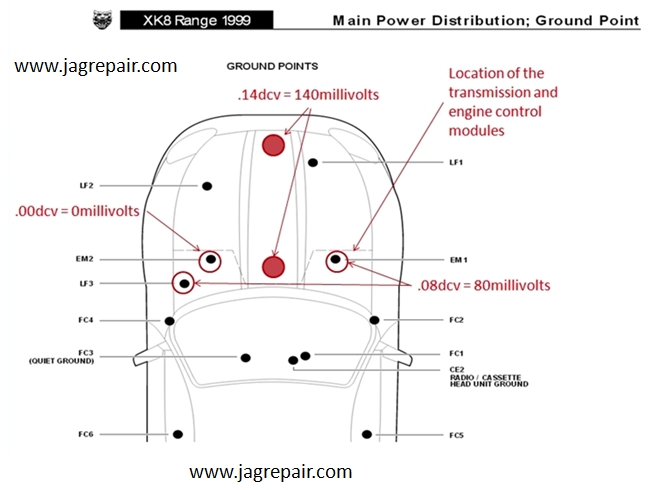
This is the results of my first test.
Notice the solid red dots in the front and back of the engine are
the coolant tower and the throttle body.
At this point I elected to clean the contact point at the frame
and the transmission bolt where the engine grounding strap is connected.
I wanted to improve the readings I got.
I should mention to disconnect the battery before you disconnect
any ground lead.
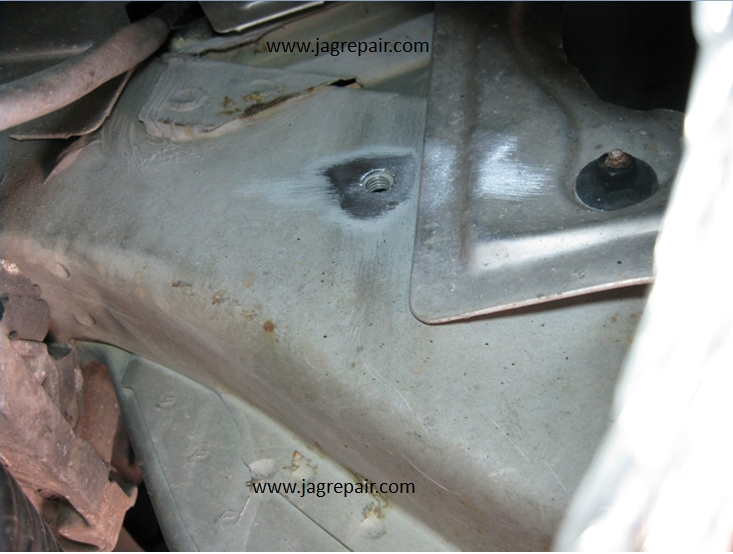
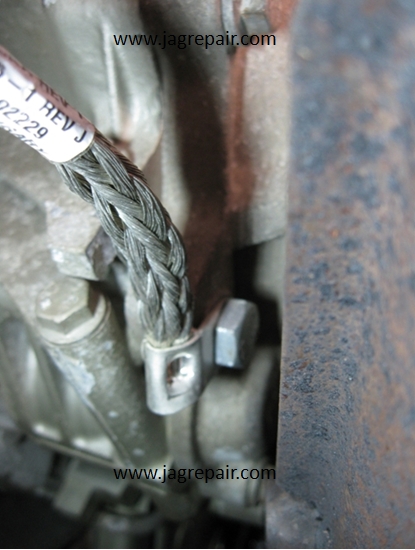
Be sure to disconnect the ground cable from the
battery before you pull the ground strap off the frame and engine.
This ground strap is located directly under the starter on the
right side lower frame of the car.
Before I replaced the strap I cleaned the contact area for a
clean and positive contact.
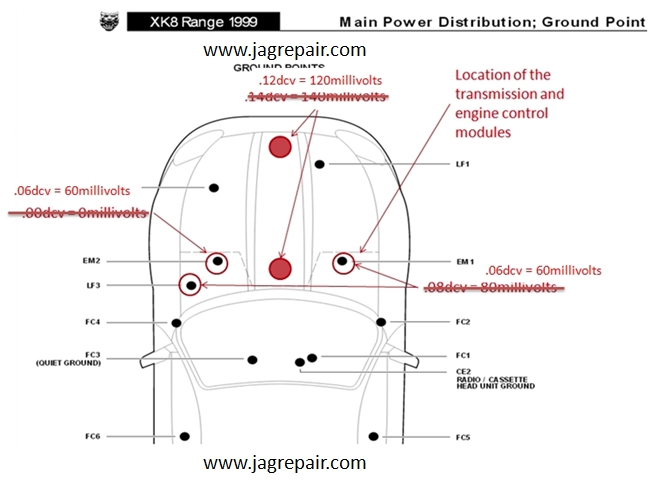
It made a little improvement to the grounding and I
was satisfied with that.
|