|
|
|
|
|
XK8 Heater Pump & ValveThis is my process of replacing my Coolant valve and pump for my XK8 heating. With this process you can remove the pump without removing the valve. But if you need to remove the valve you will need to remove the pump. I elected to replace both of them, but that was my choice. This all came about when I would hear a metallic chattering when the A/C/Heat was on. I will try to provide a video of the noise.
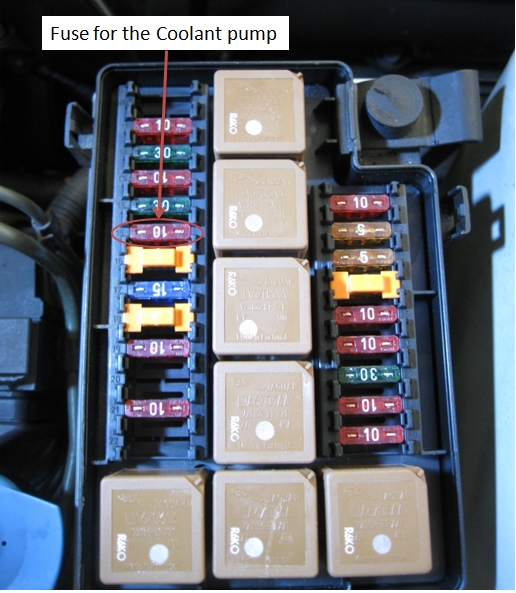
With the engine running and heat on and the noise present, I pulled the fuse for the coolant pump and the noise quit so I knew it was either the pump or the valve.
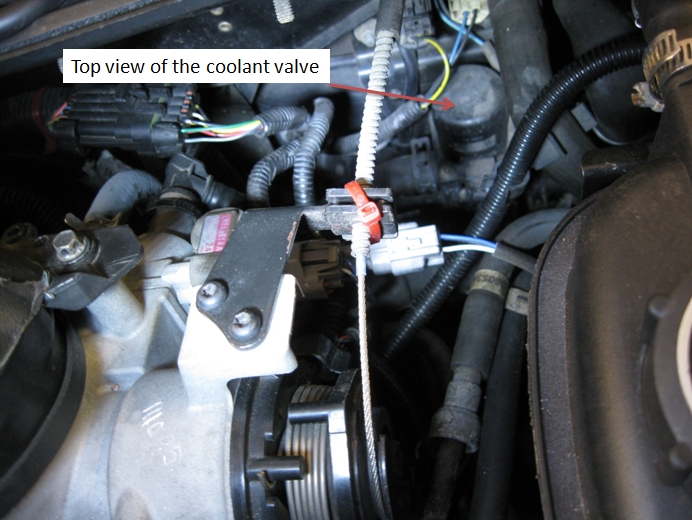
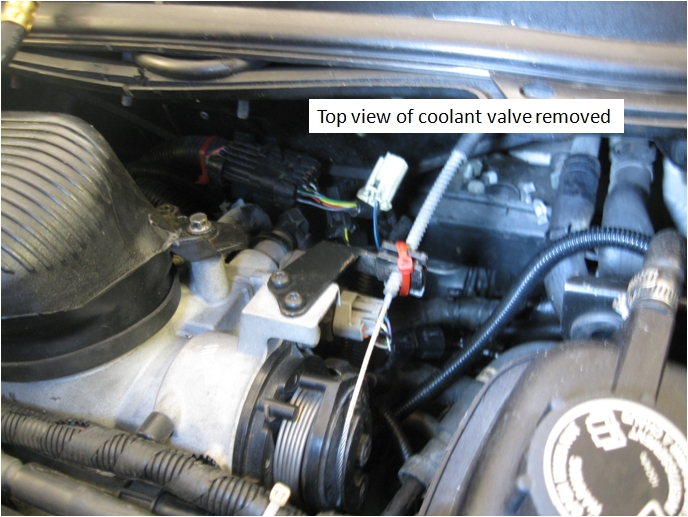
This is the top view of the coolant valve. Not much room! I would need to remove the throttle body and a few other things along with removing the nuts below on the pump to bring it out the top.
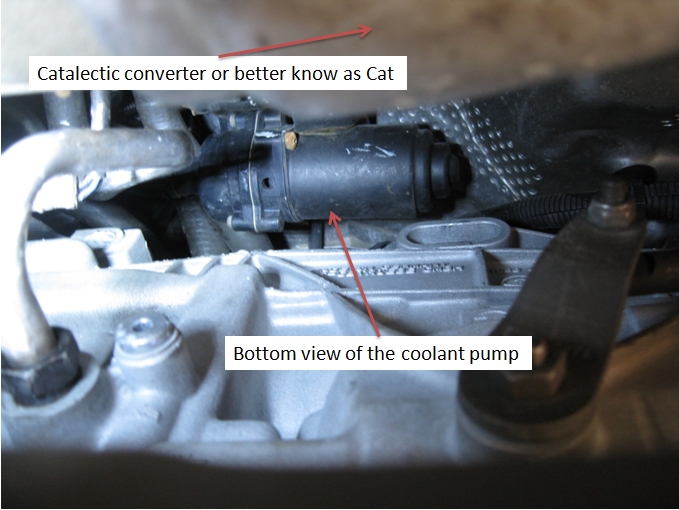
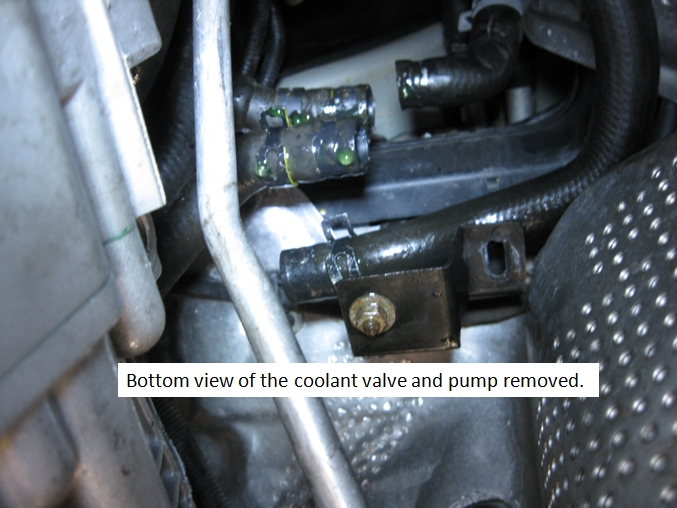
View of the pump from the bottom and I must say not much room to work with. Notice the location of the cat.
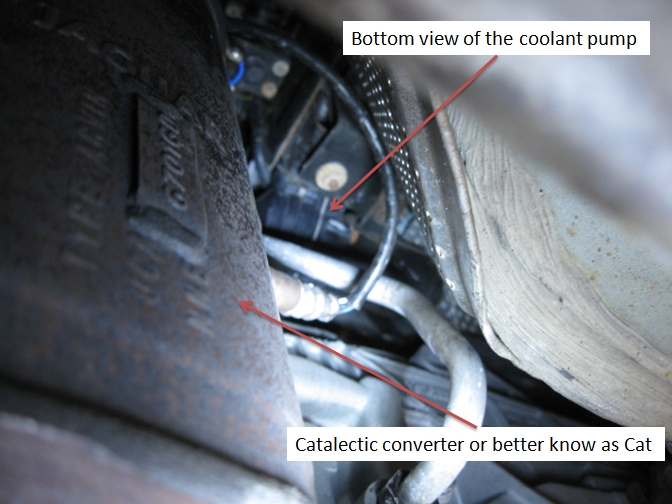
Another view and a better look at the space available.
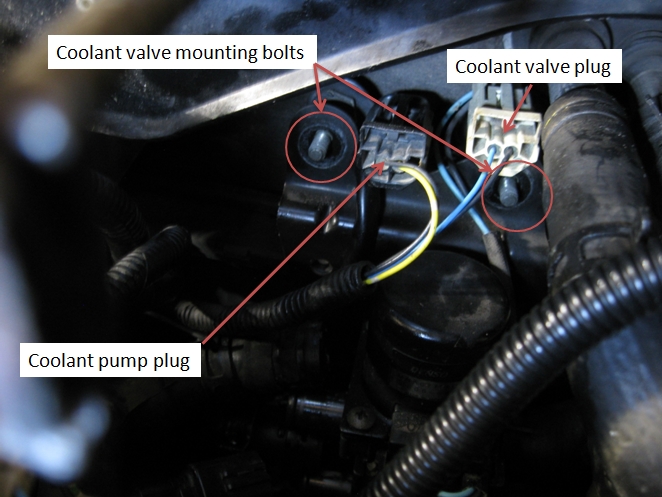
At this point I elected to remove the one cat. It was not difficult to do, just 1 clamp on the exhaust and 4 bolts at the exhaust header. I also had to disconnect the O2 sensor plugs and it came out. If you are only removing the pump you will need to remove the 2 mounting nuts for the pump, remove the 2 hoses, unplug the black plug on top and cut the wire tie wraps holding the pump lead to the valve housing. However if you are going to remove the valve you will need to remove the valve support nuts.
In the top you will need to remove both the pump and valve plugs and the 2 valve support bolt nuts and hoses. I should mention you need to know what port each hose came from so you can put them back correctly.
Now I must tell you that removing the hoses from the valve and pump are a real PITA! You will need this tool http://www.sears.com/kapsco-24inch-long-reach-hose-clamp-pliers-w/p-SPM7814684505?plpSellerId=KapscoMoto&prdNo=45&blockNo=45&blockType=G45 You should also have a hose removal tool like this http://www.sears.com/otc-4521-hose-removal-tool/p-00914641000P?plpSellerId=Sears&prdNo=1&blockNo=1&blockType=G1 Once the hoses and plugs are removed you can drop the pump and valve out the bottom.
Reinstalling the valve and pump is much easier because the hoses will slip on unlike removing them when they are stuck on. You can maneuver the clamps any way you want to get them on. I mounted the valve bracket without tightening and installed the hoses and clamps then went to the pump from the bottom and did the same thing. After the hoses and clamps were installed, I tightened the valve and pump mounting nuts/bolts. With them installed I then reinstalled the cat with a new gasket. I hope this helps.
|
|
|