|
|
|
|
|
Jaguar Seat Control Module Repair XK8/RThis procedure is to repair your seat control module. This information (photos) were made available by Jay & Glenn, I thank you both for your efforts and illustrations. I combined both repairs to provide you with all the information I had available. The first step in troubleshooting your seat not functioning is to check the fuses, if all are good see about swapping one seat control module with the other seat module and see if all functions are working. If functionality has returned than it is safe to say the module you replaced has a problem. What has been found in the past is that is that the circuit board becomes worn and the process will sever the connections on the board. Photos below will help in fixing the problem. Others found that contamination (spillage/water) on the board prevented it from functioning properly; a simple cleaning will fix the problem. I have not removed the controller myself but I understand that it is located under the seat center front and it has two bolts/nuts (10mm?) that need to be loosened. It is said that the hardest part is getting the cable harness released. The control box has a plastic cover that has several fastening points that need to be worked loose. Once removed look at the upper right hand corner you will see where the case rubbed the circuit board.
This How To is courtesy of
Steve There are many acceptable ways to fix printed
circuit boards...results are really dependent on workmanship. Small
breaks can be bridged with solder, or a small bit of wire and solder.
You can also purchase self adhesive copper repair traces, or use a
conductive paint pen. Sometimes it is easier to just solder a fine wire
(28 or 20 ga. kynar insulated wire is typically used) between the
endpoints of the components that have the broken trace between them than
ty to repair the trace. The wire can be tacked down with epoxy or
superglue. 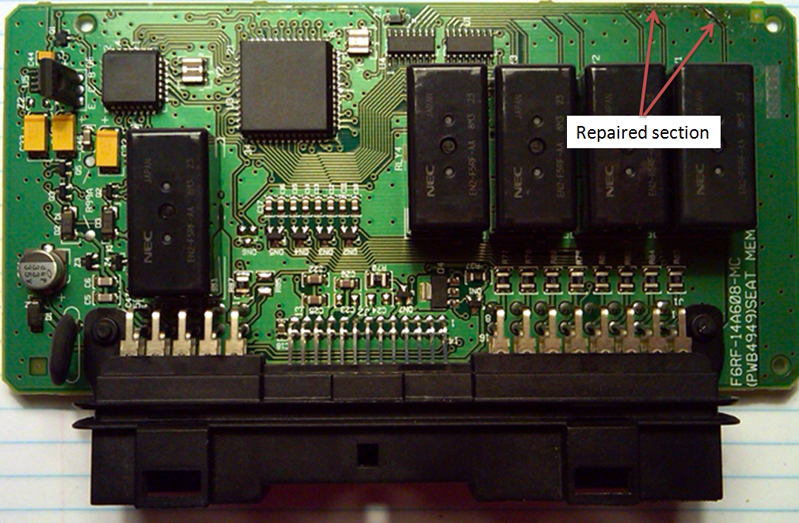 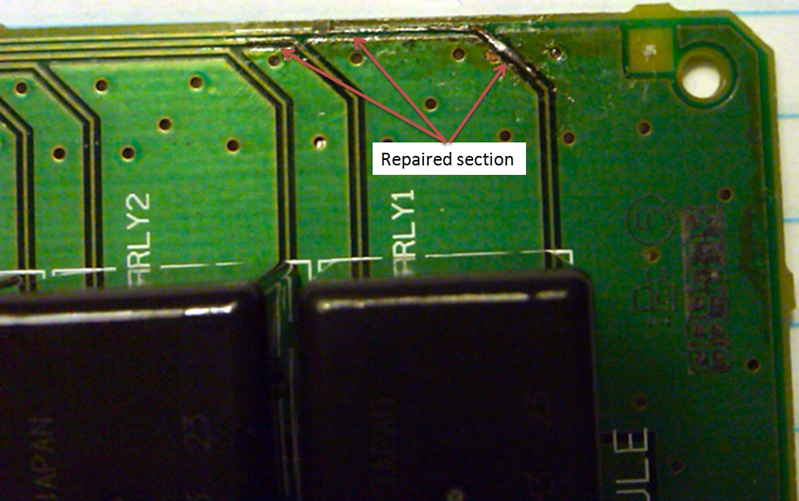  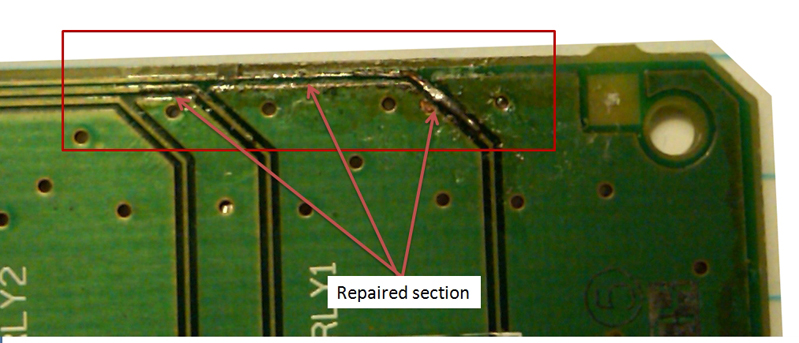  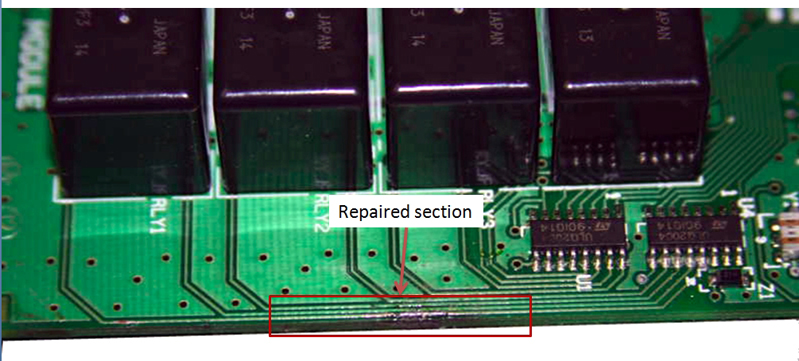
|
|
|


