|
|
|
|
|
Valve Cover Gasket Replacement & Tensioner InspectionMany have asked about removing the valve covers to replace the gaskets and/or inspect the chain tensioners. This procedure is on my 1999 xk8.
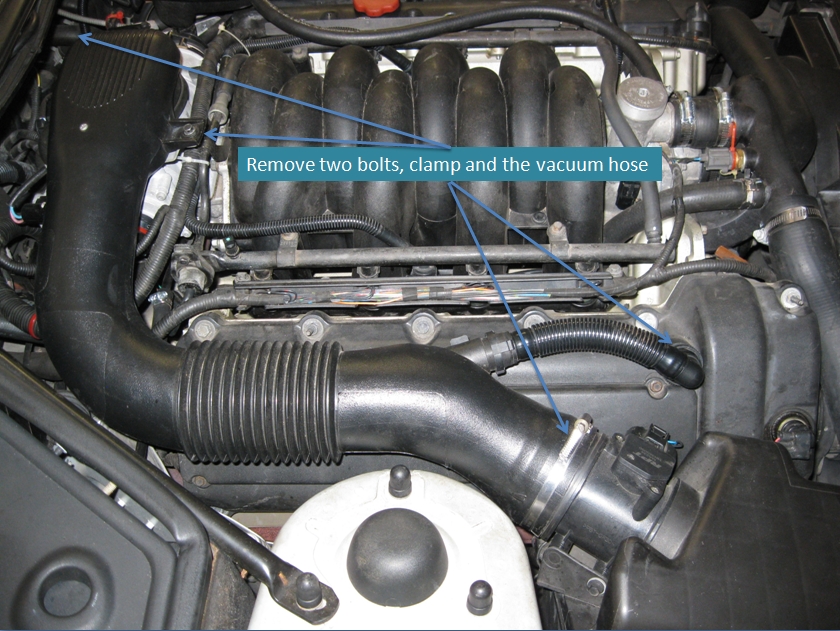
The two bolts are on the throttle body, the clamp is at the filter box at the MAFS and the vacuum hose is at the valve cover. Use caution when removing the vacuum hose. It may be brittle, so take your time. Just squeeze the two tabs and then pull it off. If it cracks replace it.
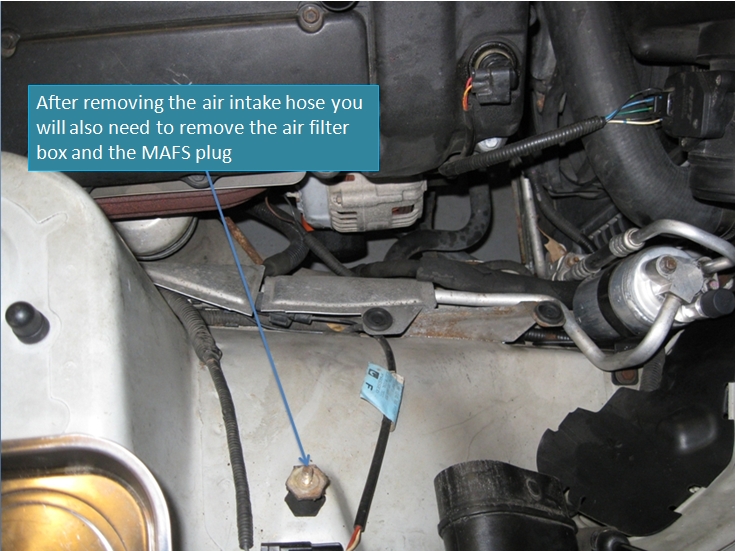
You then need to remove the air intake filter box. Open the box, remove the plug for the MAFS and remove the lid, then the filter. Look to the bottom and remove the nut holding it in place. The box may be a little tricky to remove because you have 2 pegs that hold it in place and you have the fresh air intake that goes into the fender. Just use a little wiggling and it will come out. Next you will need to remove the cover for the coil packs and all of the coil packs. When I did mine I did not unplug them, just unbolted them. You do not need to remove the plugs. I attached a link on how to replace the plugs. Link: http://jagrepair.com/PlugReplacementXK8.htm
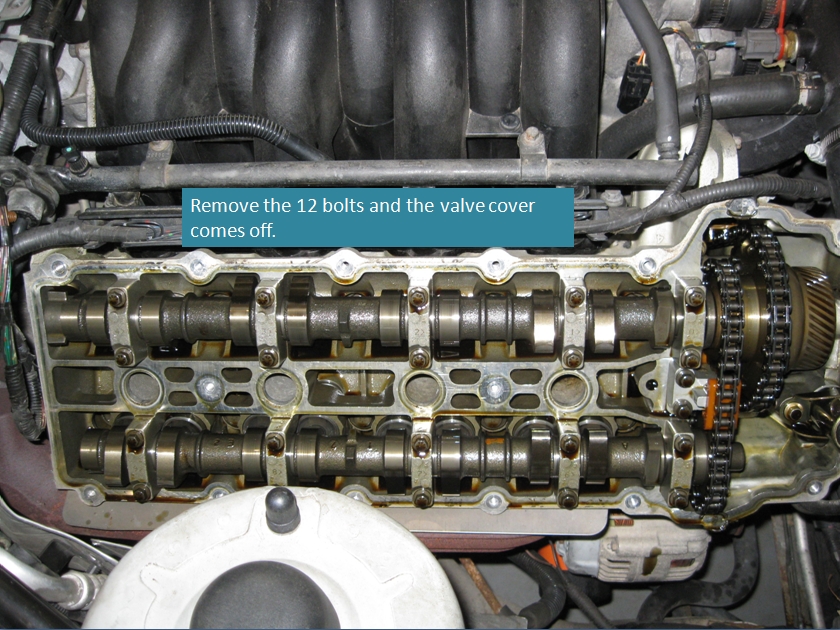
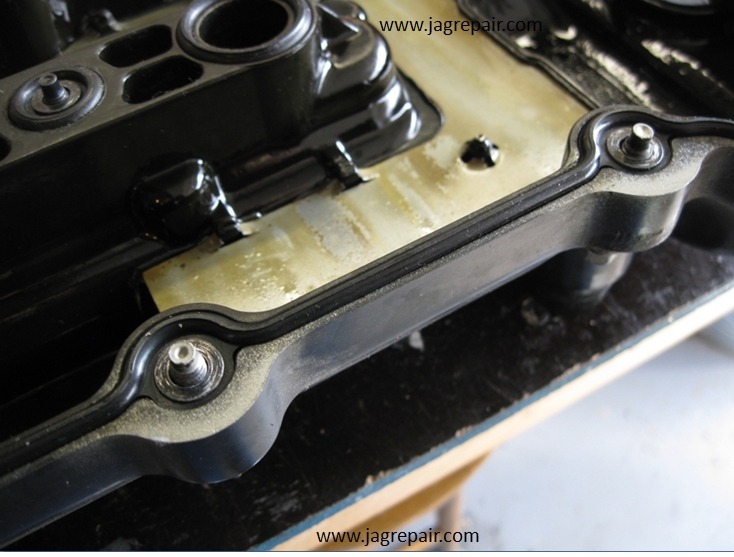
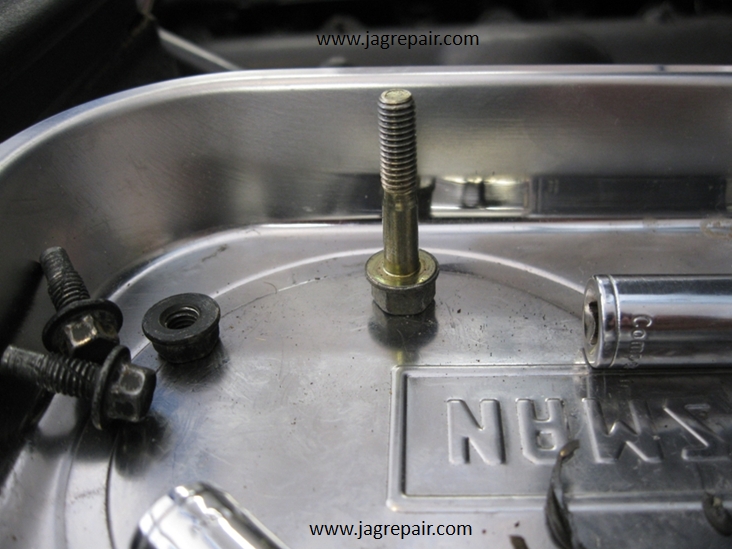
Now to remove the valve cover. You have 12 bolts plus 2 bolts inside. When removing the bolts you will find that they stay connected to the valve cover. To my surprise each bolt has a shim to hold it in place and prevent the over torqueing the valve cover preventing it from warping and leaking when the valve cover is reinstalled. However, the top left bolt on the right bank is loose and will pull out. It is a special bolt and should not be replaced if you lose it. It is mounted close to the because it is at the camshaft position sensor and could interfere with the cam timing so know where it is so it can go back to the proper location.
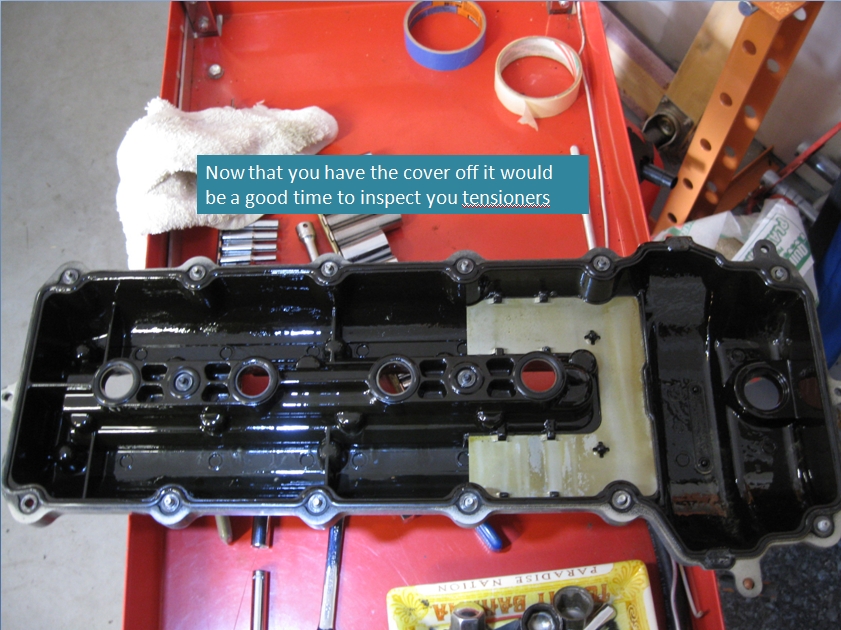
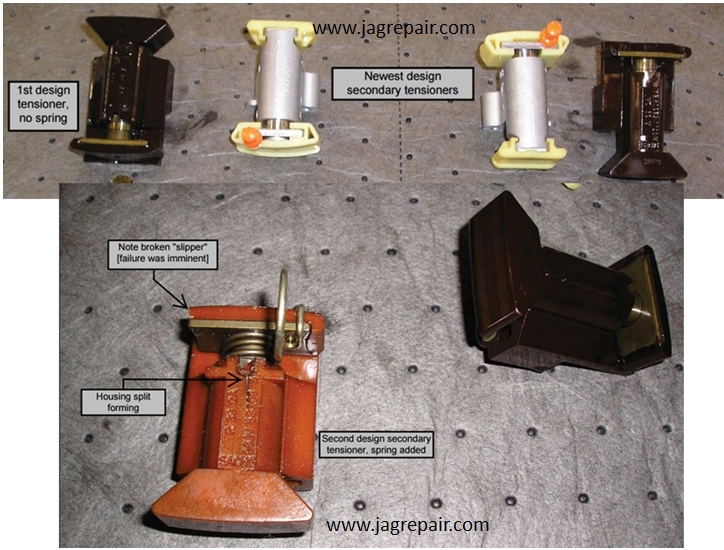
With the valve cover off inspect your tensioners.
If you have any of the old tensioners, I would recommend that you replace both left and right sides.
Removing the old gaskets is not difficult. As mentioned before, the bolts have shims and the valve cover gasket is what is holding them in place. When you remove the gasket, the shims will fall back and could fall out.
When I purchased the gaskets, I purchased the full set for both valve covers.
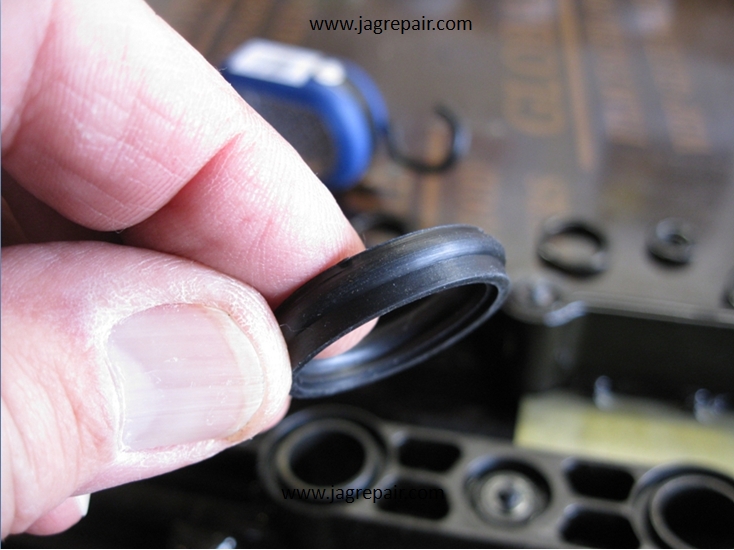
Gaskets for the sparkplug ports.
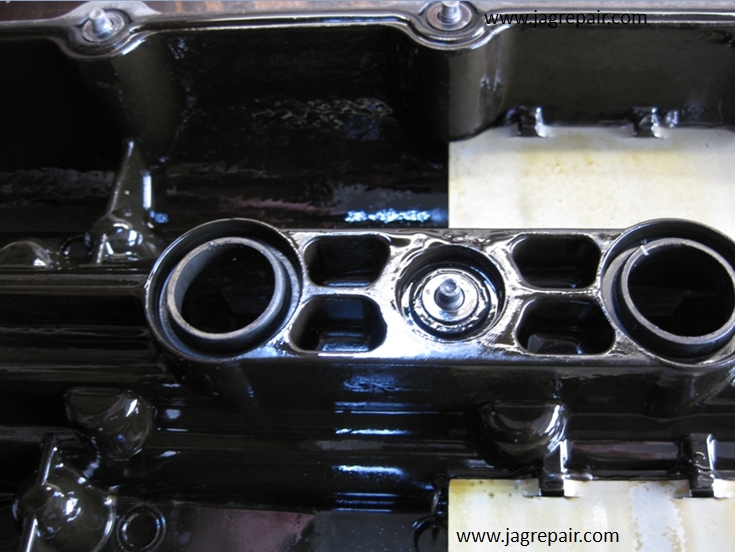
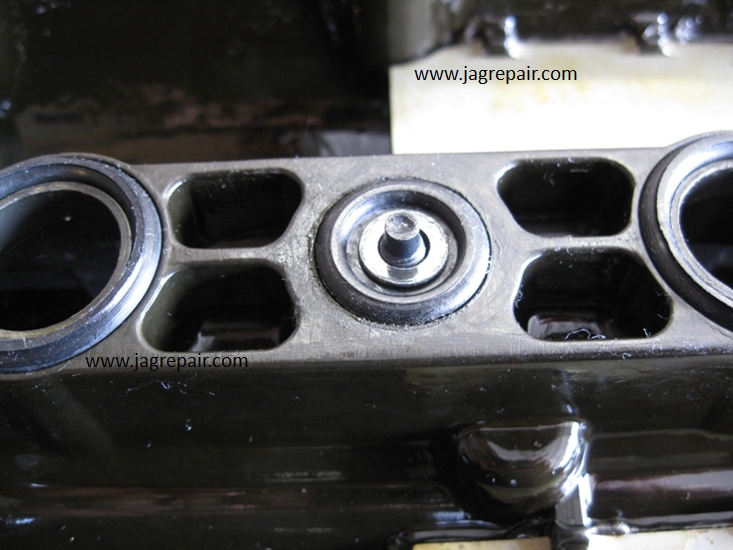
The new gasket installed under the bolt shim.
The same on this photo. The gasket must be fitted behind the shim of the bolt.
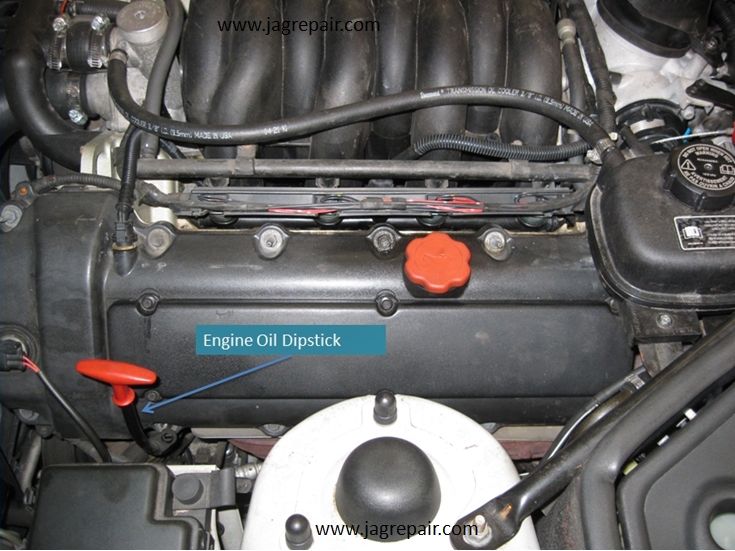
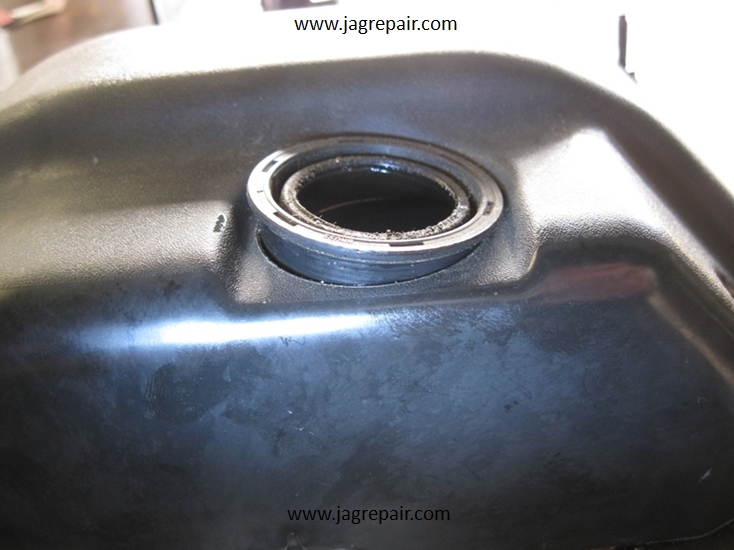
This is the left side valve cover and it will be a little tricky to remove. In this photo you can see the oil dipstick and it is held in place with a nut that fastens to one of the bolts for the valve cover. Remove the nut but do not pull and tug on the dipstick housing. Gently wiggle the dipstick tube until you have room to remove the blot. When doing this, leave the dipstick in place. The reason why is if you pull the dipstick housing out too far you will play hell getting it back into the hole when you cannot see where it goes and leaving the dipstick in will help guide you in the event you pull just a little too hard.
This is that bolt I was telling you about
This is the new VVT gasket.
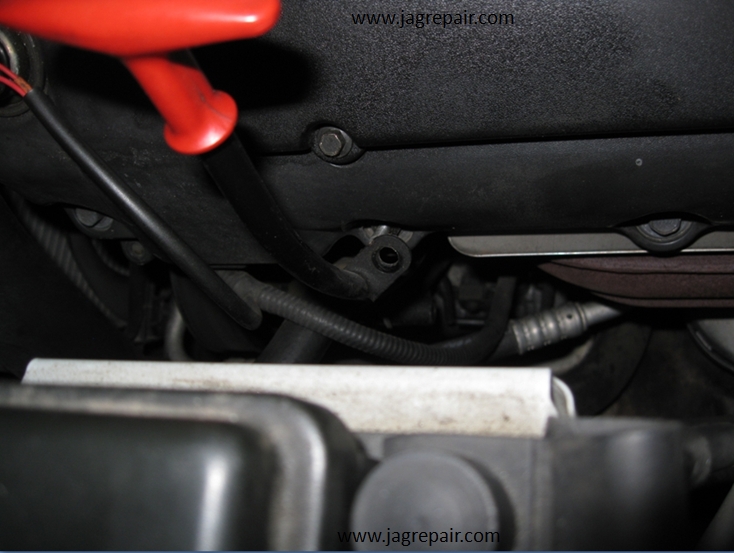
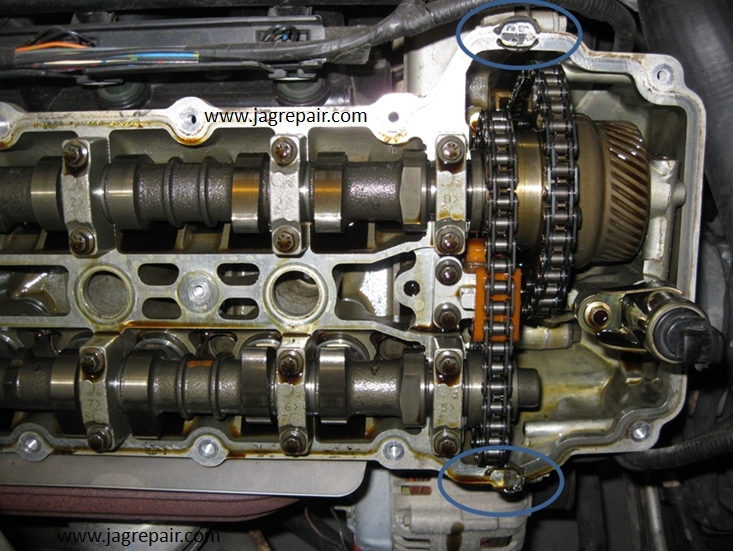
Now, before installing the valve cover you need to clean and dry the surface that the gasket is going to make contact with. In this photo I circled two areas you will need to put gasket sealer on. This is where the front chain cover meets the heads. It is a place that can leak so be sure to apply gasket sealer. Be sure to inspect your tensioners to see if you need to replace them. The ones I have are with the metal housing. Another tip before you tighten anything down, make sure the gasket is correctly installed when mounted in place. You do not want to do it again.
|
|
|